Blog Archives

How to Blog and Earn Money

FacebooktwitterredditpinterestFacebooktwitterredditpinterest

There are many of us who How to Blog and Earn Moneylove blogging about what interests us, exchanging ideas, making new friends, I LOVE blogging! It makes sense to me to do something I love AND earn money from it. I love sharing the good stuff so here are some ways on how to blog and earn money.


You need to have a blog/website up and running to earn from it but don’t worry if you’re new to this, Keep reading and I’ll get to the part about building your own blog and how to get started.

google adsense

Google AdSense


If you already have a blog with plenty of visitors then Adsense could be for you. Google describes the service as:

“an advertising placement service by Google. The program is designed for website publishers who want to display targeted text, video or image advertisements on website pages and earn money when site visitors view or click the ads.”

The easy explanation is, you put an advertising banner on your site, every time someone clicks you get paid. If you look at the right hand side of this text you’ll see “sponsored links,” if you click on it I’ll get paid!. It won’t make enough to let you leave the day job and you need to already have plenty of visitors coming to your site to make it worthwhile. However, once the ad is in place you can just forget about it.

The amount you make is determined by the advertiser, (some pay more than others) and is called the “Cost Per Click” or CPC. You won’t get paid until there is £60 ($100 in the US) in your account and how long you take to earn this much depends on the visitors to your site and how long they stay there. 

Foxy Blogger


Foxy Blogger
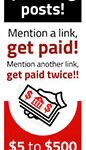
Again this is advertising but done in a different way to Adsense. There are a list of advertisers and details on how they want you to add the link to your site. You choose the advertiser link you want to have and get paid, again this varies but I’ve averaged $5 a link. You can have 3 links on one page and unlike AdSense you get paid as soon as the link has been checked and approved.


The downside to Foxy Blogger is thinking of ways you can add the link into your post in a natural way. There is a useful page of 50 ways to mention any website, here are a few taken from the page.

#1 Mention a dentist website in your web design blog as having a nice background.
#2 Mention a plumbing website in your financial planning blog as a typical client.
#3 Mention a photo on the website as having inspired you in your fitness blog.
#4 Mention the website as an example of good HTML markup on your web design blog.
#5 Mention the website as having a very compelling opening paragraph on your marketing blog.

The way I see it, I’m writing the blog anyway and it only take a little extra work to make a bit of cash!


Membership Subscription 


You need a strong following to have a paid membership website. You’ve earned peoples trust and have a newsletter already going out to subscribers. On membership sites there is generally content that everyone can see then a premium section available to members only.

Authority

Authority is an example of a paid membership site; it offers unique content for “around a dollar a day”

I found a great article over at Copyblogger about membership sites; it gives you all the basics you need to know.

Wealthy Affiliate


If you’re new to blogging and want to know how to blog and earn money then Wealthy Affiliate is the place for you.

Wealthy Affiliate University how to earn extra income at homeis an online training program where you learn how to become an Internet Marketer (how to blog and earn money). There is a free starter membership you can join and no card details are needed. You can stay a starter member as long as you want and it remains free. Among other things you get 2 free websites and step by step training on how to start your website.

I became a premium member after just 3 days and LOVE Wealthy Affiliate for some of the following reasons.

  • Comprehensive step by step training in every aspect of Internet marketing.
  • Live Chat 24/7
  • Easy to use WordPress website builder
  • Large community to interact with (I’ve made many new friends since joining Wealthy Affiliate).


I’ve written a  full review of Wealthy Affiliate here but why not just join as a FREE member anyway, it won’t cost anything! You can join me here now and start learning how to blog and earn money.

FacebooktwitterredditpinterestFacebooktwitterredditpinterest

How to Earn Extra Income at Home

FacebooktwitterredditpinterestFacebooktwitterredditpinterest

There are thousands of how to earn extra income at homepeople asking this question every day, “how to earn extra income at home,” and for many different reasons. You might also ask “what has this got to do with upcycling?” Part of the reason for many people being interested in upcycling is not just reducing their carbon footprint but also to improve their finances.


You might be:


  • a stay at home Mum
  • want to save for something specific
  • on a reduced pension
  • can’t get a job
  • don’t earn enough

all good reasons for wanting to increase your income and I’m sure you have your own story to tell. So, let’s get down to business……….

CeX


What is CeX? TCeXhis is the blurb from their website:

“CeX was founded in London in 1992. We have stores in the UK, Spain, USA, Ireland, India, Australia, Portugal and Netherlands, Mexico. We buy, sell and exchange a range of technology and entertainment products including mobile phones, video games, DVDs and Blu-ray movies, computers, digital electronics, TVs and                                                                                 monitors, and music CDs.”

So you replaced your laptop, upgraded your phone or have electronic items you no longer use, earn some extra income from them. I’ve personally used the CeX service both for selling and buying (there is a store local to me) and give them 10 out of 10 for service whether you’re buying or selling. I took all the DVD’s I’d watched and made enough money to replace my “non smart” mobile phone for a smart one!

De-clutter and Sell On Ebay


Ebay is great for de-cluttering selling on ebayand making money from it. You know that Monsoon dress you bought for a special occasion? It’s been in the wardrobe for a year, you’re never going to wear it again and it’s too good to cut up and upcycle. Pop over to Ebay and do a search “Monsoon,” most of the auction items I found had bids on them. Ebay has an extensive support section for sellers but for extra tips pop over to the money saving expert, Martin Lewis.

You need to factor in postage and packaging costs and be prepared to post items in a timely manner, essential for building a good seller reputation. Ebay is a good way to earn a bit of extra income but remember they take a percentage of the final sale value so make sure you take this into account.

Sell your Old Books


You can sell your books sell your bookson Ebay but the best place is Amazon Marketplace. You only need to write a description and the book stays up till it sells. Full reviews are provided for most books so this saves you time.

Amazon also adds the posting so take this into account when setting the price; and remember to read the terms and conditions regarding commission.


Car Boot/Garage Sales


You can sell ANYTHING car boot saleat a car boot sale and I mean anything. I’ve seen people actually buy rusty nails! If you have very young children try and leave them with a babysitter otherwise you’ll take more junk home than you sell! I’ll be honest, it’s hard work and not pleasant if the venue is outdoors in horrible weather. Having said that, you can get rid of all the clutter and earn some cash in one fell swoop.


Get Paid to Click


The best site I know for get paid to clickthis is Topcashback, an example is clicking through to Gocompare to get a car insurance quote; this pays £2.31. There is a free cash-back section which lists the best offers and if you make it part of your online schedule the cash will add up. There are many cash-back sites, Topcashback is one I’ve used myself. For an excellent article on using cash-back sites, again Martin Lewis over at Money Saving Expert has the lowdown.


These are just some ideas for how to earn extra income at home but you can also earn an income from blogging, pop over and have a read! If you’ve any questions please contact me or leave a comment below


FacebooktwitterredditpinterestFacebooktwitterredditpinterest

Top 10 Steam Irons

FacebooktwitterredditpinterestFacebooktwitterredditpinterest

For someone who has stated that she doesn’t like ironing you might wonder why I’m writing this guide to my top 10 steam irons under £50!

It’s simple, if you’re a dressmaker you need a decent iron. An iron that you can’t clean or that spits brown water over your your hard work just won’t do.

I needed a new iron and always do extensive research before making a purchase. I researched 10 steam irons under £50 and chose to review the 5 I considered to be the best buys.

You can be like this:

Cartoon lady ironing


Or like this:

Sad cartoon lady ironing


I’ve already done the hard work and found you what I think are the best value steam irons available. Read my reviews and make sure you’re like the 1st character and not the 2nd!

Features to consider:

  • Power
  • Water tank capacity
  • Steam boost
  • Price
  • Soleplate
  • Ease of cleaning
  • Anti drip
  • Cord length
  • Warranty length

These are my top 5 based on features and price.


FEATURES:

  • Continuous steam output up to 40 g/min with 130 g steam boost- Steam output is measured in grams of weight as it leaves the soleplate. The heavier the output the deeper the steam can reach into the fabric layers. This way you need fewer ironing strokes to evenly moisten the garment and therefore less time to complete the ironing. It’s also great for those stubborn creases and getting a sharp crease on your garments.
  • 2400 Watt enables constant high steam output – 2400 means energy efficiency.The cord has a 360 degree swivel  for making it easier to iron. No more tangles and twists means you get yoru ironing done faster.
  • SteamGlide soleplate is Philips premium soleplate – SteamGlide soleplate Philips innovation soleplate. It is scratch resistance, glides perfectly and is easy to clean. Steam is distributed evenly across the soleplate..
  • Vertical steam for crease removal in hanging fabrics – The iron can be used vertically and the steam is powerful enough to be used to iron out creases from curtains or hanging clothes. You can use this function for freshening up clothes.
  • Safety Auto Off – 3 state automatic cut out feature.
  • Drip stop system – Lets you iron delicate fabrics at low temperatures without getting stains from water droplets. Especially good for silk fabrics.

I love the 3 state auto off safety feature, it cuts out when it:

  • still for 30 seconds on sole plate.
  • 30 seconds lying on side.
  • standing on heel rest for 30mns.

No more worrying if you’ve switched the iron off when you go out!

CONCLUSION:

This is a great iron towards the top end of my £50 budget. It is worth every penny just for the extra features you won’t get on a lower priced product and my first  choice out of the top 10 steam irons I reviewed.

Click here to buy from Amazon with free delivery!


FUNCTIONS:

  • Ceramic soleplate – ceramic soleplate will glide effortlessly glide over fabrics cutting down on ironing time and ensuring a crisp sharp finish.
  • Anti-drip and anti-scale –  This feature stops water dripping at lower temperatures and staining your garments.
  • Variable steam – steam settings to suit various fabrics plus a powerful 35 g/min steam output and 95 g shot of steam, great for those stubborn creases. Also useful for getting that extra sharp creae on your trousers.
  • 2 year warranty – Russell Hobbs products are guaranteed for 2 years, you usually have to pay extra for this lengtrh of warranty.
  • Safety light – this indicates when the iron is at it’s optimum temperature, and ready for use.
  • Vertical steaming – useful for removing wrinkles from furnishing fabrics, curtains and from hanging clothes. It can also be used to freshen up garments.
  • Self-clean function – comes with an anti-scale agent to prevent the build up of scale.
  • Fine mist water spray – perfect for dampening dry areas.
  • Swivel cord – 360 degree swivel cord for added convenience

CONCLUSION:

This is a good buy if you’re on a tight budget and with a 2 year warranty included what’s not to like.

Click here to buy from Amazon with free delivery


FUNCTIONS:

  • Autoclean soleplateSmooth ironing thanks to the  Palladium Autoclean system. The system uses catalytic oxidation as the iron heats up to transform the fibres stuck on your iron  into gas and steam. This soleplate has also has been specially made with a built-in anti-drip system and has extremely scratch resistant and hard wearing properties.
  • Steam Power Zone  – 170g/minute shot of steam thanks to the steam Power Zone. Helps to make light work of difficult and stubborn creases thanks to the Aquaspeed’s two times faster shot of steam via  a trigger control. 
  • Refilling in only 4 seconds – You can fill this iron quickly thanks to an extra large water tank opening with no splash or spills.
  • Large water tank – A 300ml water tank saves you from having to keep refilling, great for getting through the ironing quickly.
  • Front fill – This gives you for extra safety when filling the iron.
  • Easycord systemKeeps the cord away from the clothes you are ironing and comes with a long 3m cord.
  • Double anti-scale – Anti-scale and anti-drip functions for easy maintenance, no more drip stains on your clothes with this anti-drip function.
  • Extra large open heelThis provides extra stability when standing upright and means it is for safer storing away.
  • Enhanced glideabilityraised lines running across the soleplate ensure excellent heat distribution and reduce surface area resistance making for a crisp finish on your clothes.
  • Vertical steam function – This is ideal for getting creases out of suits or other hanging garments It can also be used to de-crease curtains and freshen up clothes.

CONCLUSION:

I liked the extra large open heel for stability of the Tefal FV5370G1 Aquaspeed Ultracord Premium Steam Iron, the raised lines for glideabiity and the large water tank. A feature packed steam iron for a good price.

Click here to buy from Amazon


FEATURES:

  • Powerful Pressurised Steam Iron – This steam iron has a powerful continuous steam output of 50 g per minute for consistently fast results and a 200 g steam boost for deep crease removal
  • Vertical Steam – The iron can be used to steam vertically with enough power to remove creases and refresh curtains or hanging clothes such as suit jackets or dresses.
  • T-IonicGlide soleplate – This is the Philips patented coating which glides easily and makes it very scratch reistant. The carefully designed shape and vents provide an even steam distribution for faster crease removal.
  • Easy de-scale & reminder – In addition to the Quick Calc Release a more thorough clean of your soleplate will remove the most stubborn calc. A clean soleplate will improve your steam performance and ironing results.
  • Fast heat up time – It only takes 2 minutes to heat up.
  • Triple precision tip – The tip of this Philips iron is precise in 3 ways: it has a pointed tip, button groove and a sleek design of the nose. This enables you to reach into tricky areas of your clothes such as around shirt buttons or between dress pleats.
  • CordGuide – The innovative CordGuide clicks to your ironing board and keeps the cord out of your way when ironing.
  • Drip stop system – Drip Stop system lets you iron delicate fabrics at low temperatures without having to worry about any water droplet stains.
  • Quick Scale Release – This is a  detachable scale outlet located at the back of the iron. When your iron is left on the heel rest, scale particles are collected at the base, which can be emptied quickly for fast and easy cleaning. No more white marks or having to rewash clothing!
  • Safety auto off – To save energy, the appliance switches off automatically when it has not been moved for 8 minutes when left standing on its heel. and after 30 seconds when left resting on its soleplate or sides.

CONCLUSION:

There are a lot of good features with this iron. I like the triple precision tip on this one and the quick scale release. I didn’t like the short cord length, at the top of the budget a decent length cord should be standard.

Click here to buy the Philips GC4521/87 Azur Performer from Amazon


Russell Hobbs 21570 Steamglide Iron

  • Dry/Steam/Spray and burst- a powerful 35 g/min continuous steam output and 110 g shot of steam for easier ironing plus, variable steam settings and temperature.
  • Stainless steel soleplate – For gliding smoothly over your fabric.
  • Powerful vertical steam – The iron can be used vertically and the steam is powerful enough to be used to iron out creases from curtains or hanging clothes. You can use this function for freshening up clothes.
  • Large water tank – Generous 300ml water tank, lets you iron for a long time before you need to refill.
  • Mist spray –  Fine mist water spray for dampening your clothes prior to ironing.
  • Anti-drip –  Iron at low temperatures without getting stains from water droplets.
  • 3 year guarantee – for peace of mind.
  • 2m power cordthis extra long cord also has 360 degree swivel.
  • Self-clean function – helps to keep your iron in tip top condition.
  • Soft touch handle – for comfort grip.

CONCLUSION:

The Russell Hobbs 21570 Steamglide Iron is a good budget priced iron. While it might not have as many features as the more expensive models I thought it was worth a mention for the 3 year guarantee and the 2m cord.
 
FacebooktwitterredditpinterestFacebooktwitterredditpinterest

How to Go Green at Home

FacebooktwitterredditpinterestFacebooktwitterredditpinterest

I’ve slipped a disc in my back and can’t do any sewing projects to share with you at the moment. I thought I’d take some time to post about how to go green at home with these great upcycling ideas.

Milk formula cans

What do you do with your upcycled baby formula cans
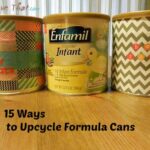
baby formula cans? If you imagine the amount of baby cans just being dumped and the years it takes for them to break down, that’s a pretty big pile of cans! There’s a pile of good ideas on the Internet, can bowling was one I found here. There are 15 ways to upcycle your baby cans, no excuse for adding them to landfill!

Upcycled sweaters

If you have young children upcycled sweater slipper
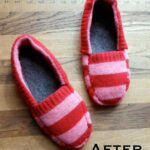
and babies then in winter you probably spend a lot of time in the house. How about making yourself some toastie slippers from an old jumper. In Scotland we get very cold winters, once my back is better I’ll be making a pair! I’m loving this idea and you’ll find the tutorial for upcycled sweater slippers here.


Christmas stockings Christmas Stocking from old jumper
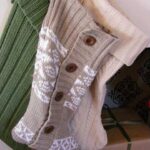
can also be made from old sweaters and it’s just the right time of year for making them. It’s a time when people have clear-outs and also prepare for Christmas, perfect! You can find the tutorial here, a great blog about imperfect home making!


Another good upcycled Upcycled sweater cup holder
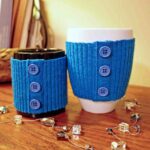
sweater idea are these cup holders. You could incorporate a sweater pocket and use it for popping a biscuit in! I found these here, a blog with some pretty cool ideas.


Tin cans

We all use tin cans at some upcycled food canstime or another and there are some great ways to upcycle them. The most common on is as a pencil holder, I’m sure you’ve seen these at some point! This blog has some great ideas, from a simple plain can with the edges smoothed down to the more elaborate organizer in the picture.


Baby food jars

I don’t use them so much these days with my kids being all grown up but there are lots of ways to upcycle them. I make jam and chutneys and found this size ideal when making little gift hampers. I’ve also used them in the garage to keep those screws and nails organized.


There’s some really upcycled tin caddycool ideas like these tree lanterns at inhabitots.


Let me know your upcycling ideas for how to go green at home. You can comment below or contact me I’d love to hear from you!

FacebooktwitterredditpinterestFacebooktwitterredditpinterest

Alternatives to Recycling

FacebooktwitterredditpinterestFacebooktwitterredditpinterest

Sometimes for various reasons making your own things isn’t practical, it might be because you

  • don’t have the time
  • lack the skills
  • lack the time to learn the skills

There are alternatives to recycling and upcycling and we can always find ways to reduce our carbon footprint.

Eco Friendly Baby Clothes.

Eco friendly baby clothes are made without harsh chemicals and with non toxic dyes. There are many different organic natural fibres used such as:

  • Cotton
  • Hemp
  • Bamboo
  • Soy
  • Wool

Most eco friendly baby clothes are eco friendly baby clothes
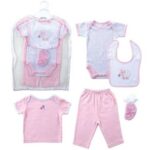
also Fairtrade, meaning the producer receives a fair wage for their work. There are many stores now selling these products both on the high street and online. Hudson Baby Clothes are an ethical company and sell a cute range of organic baby clothes in bamboo and cotton, at affordable prices. A Google Search will find tons of results, lots to choose from!

Modern Cloth Nappies.

Decisions decisions, disposable or cloth nappies? For cost effectiveness modern cloth nappies are the way to go. Having said that, many parents opt for both, disposables for outings and cloth for at home. These days cloth nappies are sold as “systems.” No more learning how to fold them and chaffed legs from rubber pant elastic! Check out the Charlie Banana 2-in-1 Reusable Diapering System link to see what a modern cloth nappy looks like.

For disposables Naty Babycare Diapers are the most well known. Bleach free and in a wide range of sizes these will help keep your baby free of the dreaded nappy rash! Their products are 100% renewable so a very eco friendly disposable nappy to buy.

Eco Friendly Baby Toys.

I’ve written a couple of tutorials for making your own baby toys from scrap fabric like this taggie blanket and plush baby toy. Again not everyone has time to do this but there are many companies now producing eco friendly baby toys. Ethical Superstore based in the UK stock a wide range of toys amongst a wide range of ethical goods. In the US Amazon is a good source of eco friendly baby toys.

And Lastly

Another often forgotten about alternative to recyling is to buy your baby items from charity shops. Many of these items are like new, as you know babys don’t stay the same size for long. Second hand baby markets are also a good source of items for your baby. I’ve used these myself and seen everything being sold, from pram systems right down to booties, toiletries and toys.

Happy Shopping!


FacebooktwitterredditpinterestFacebooktwitterredditpinterest

Last Minute Handmade Christmas gifts

FacebooktwitterredditpinterestFacebooktwitterredditpinterest

There’s still time to make gifts for family and friends so here is a reminder of some of my tutorials. These are simple enough for those those last minute handmade Christmas gifts. Most of these projects can be made with things you already have in the home. You can also get my free ebook which has 3 easy tutorials for you to follow. Just enter your name and email to the subscribe form on the right to get your FREE ebook!

Baby Toys to Make.

If you’ve had experience with babys then you’ll know they like the simple things best.

The most popular one Baby Lilly holding taggie blanketI’ve made has been the taggie blanket, babys just love it! For extra texture, instead of the animal applique you can sew on some different scraps of fabric, velvet, seersucker, a piece of hook and loop, felt etc. You can also make them smaller or bigger, even pram blanket size.


Made with the same base fabric Baby Lilly with plush baby toyis this plush baby toy. A little bit trickier to make as you’re sewing in a circle but still simple enough for a beginner. This is another one you can adapt and if you struggle to sew a circle then just make it a square!


 Useful Baby Gifts to Make

One of the most useful things Diaper Bag
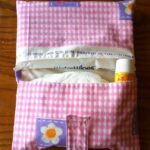
I’ve made which, according to baby Lilly’s Mum, is the diaper bag. This has been in constant use since Lilly was born!


A christmas bib is Baby christmas dress and matching bib
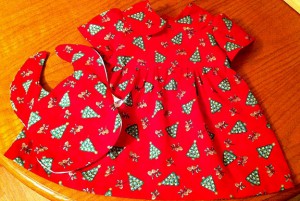
something you could make with festive fabric. Follow the bandana bib tutorial here, I did one to match the baby christmas dress I made.


My recent post, “How to Patchwork Quilt” How to patchwork quilt finished
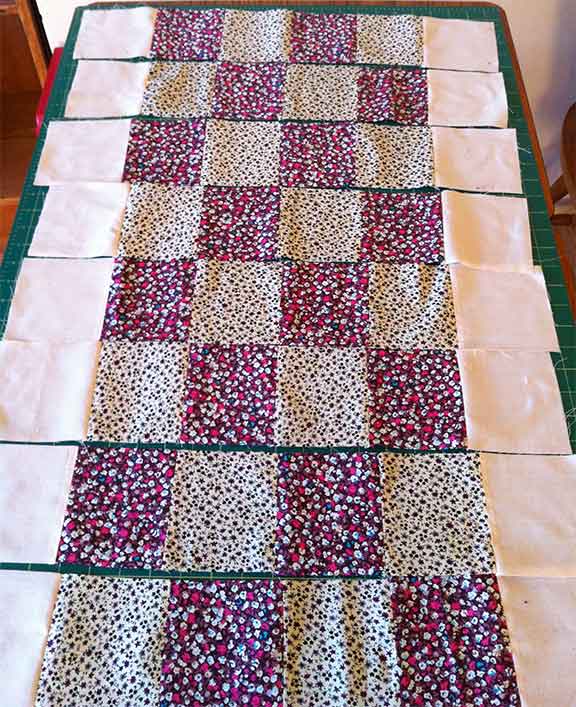
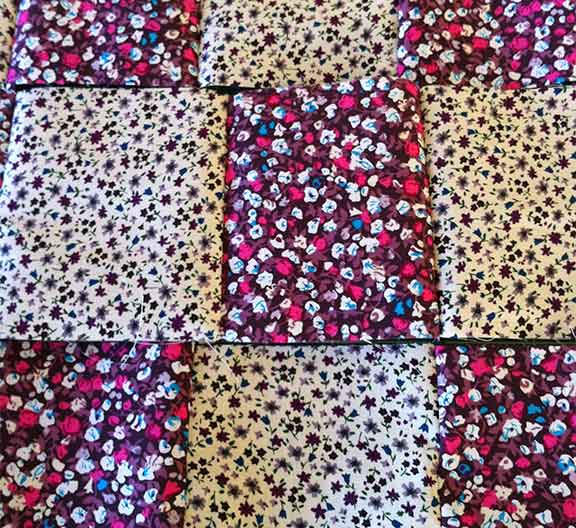
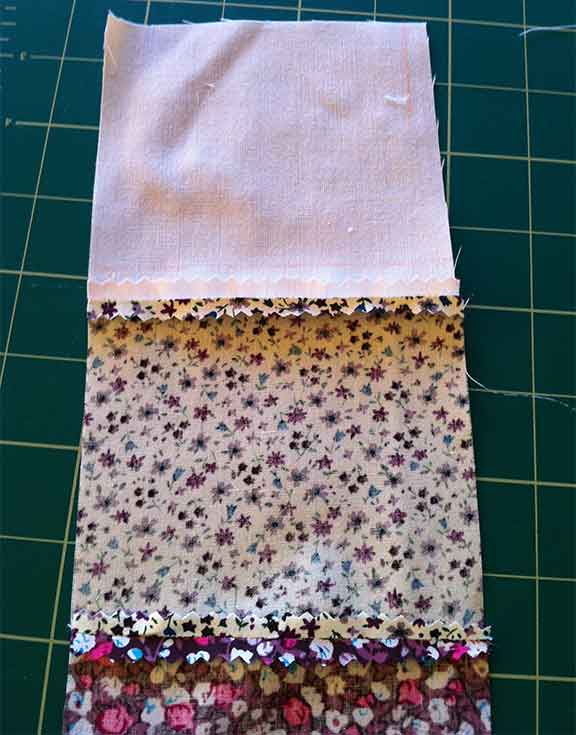
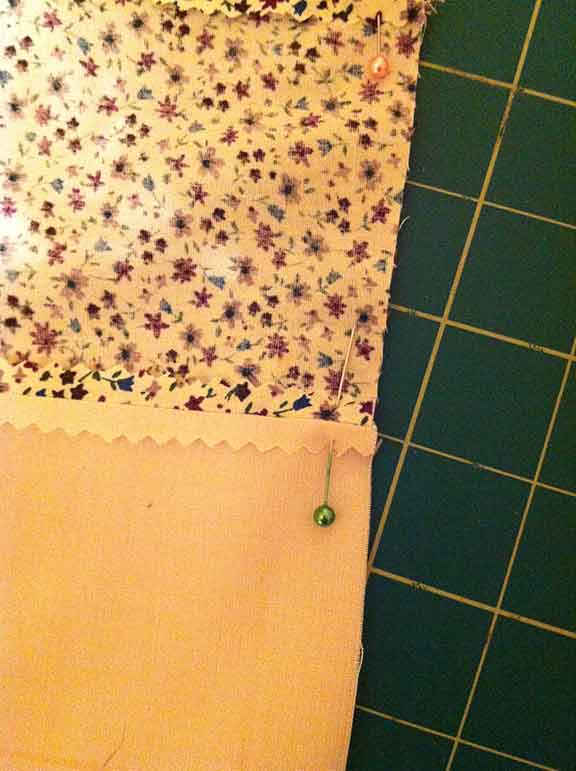
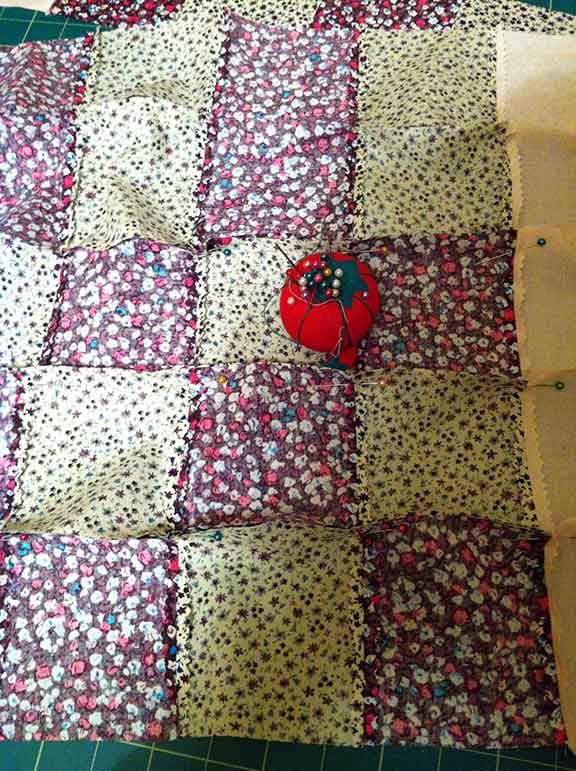
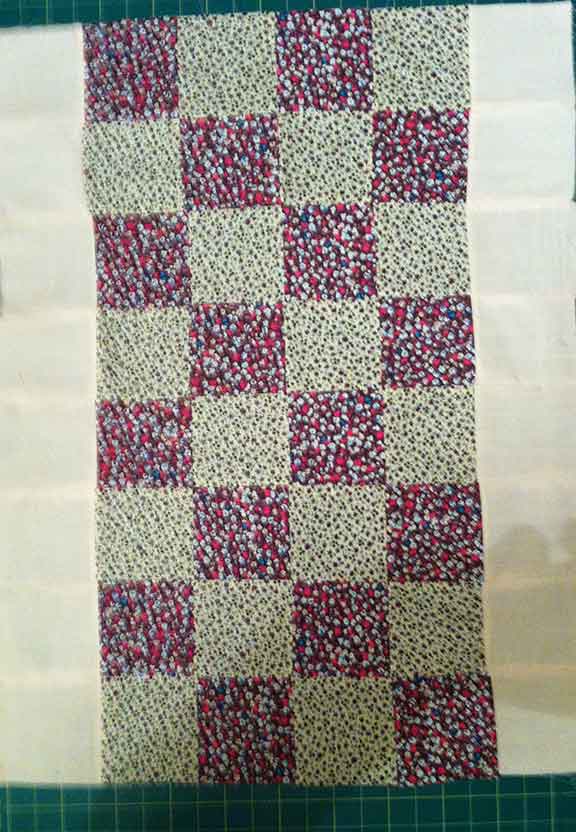
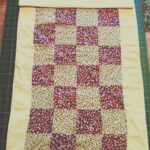
showed you how to make a pram quilt. This would make a beautiful gift and could even become a family heirloom!


Other Gift Ideas

One of the simplest things to Handmade bookmark
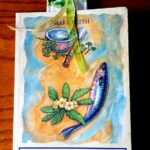
make is this handmade bookmark, you’ll find a tutorial here. These suit all ages and can be customized to suit the person you’re making them for. Adapt the pattern slightly by doing a square shape and filling with lavender or other aromatic herbs.


A festival/utility belt can be made Festival Belt
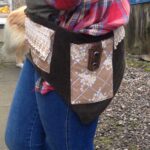
for all ages but the young ones love them for taking to festivals!
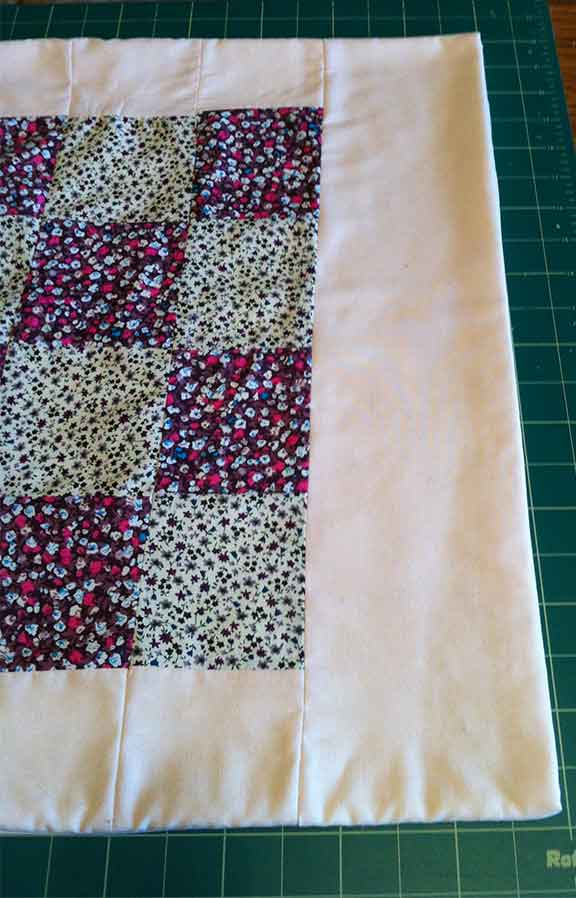
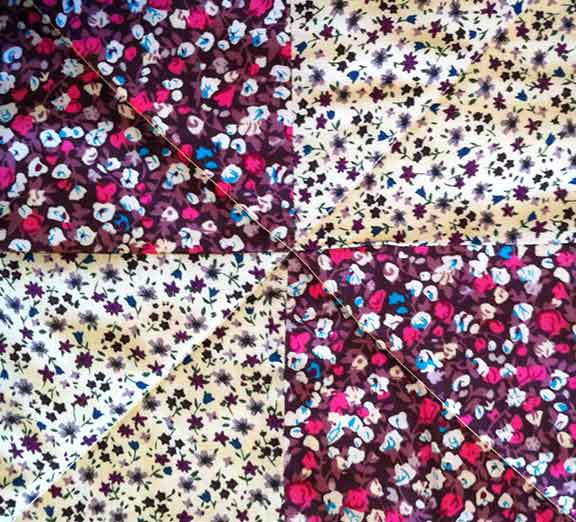
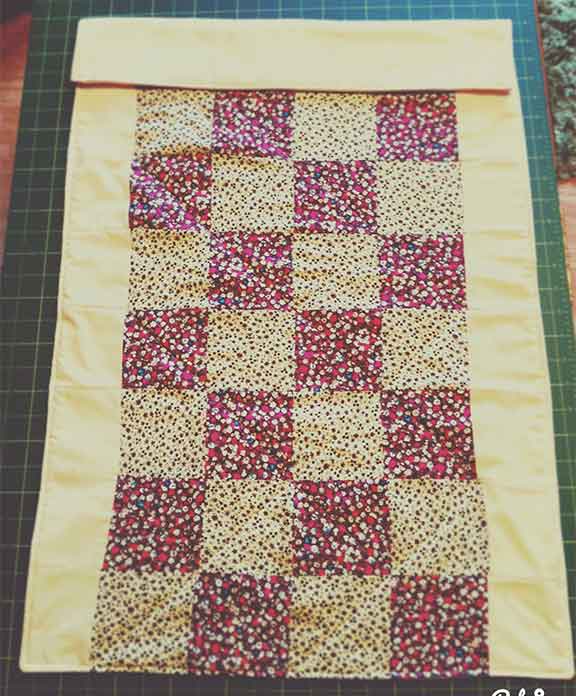
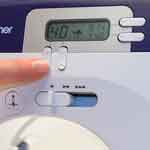


These are just a few ideas for easy homemade Christmas gifts. Have a look through my “projects to make” category for more ideas. You can also check out my “projects to try” Pinterest board for more ideas.


And lastly, if you do need any supplies check out these links.

HAPPY SEWING!

FacebooktwitterredditpinterestFacebooktwitterredditpinterest

The History of Patchwork Quilting

FacebooktwitterredditpinterestFacebooktwitterredditpinterest

In my tutorial “How to Patchwork Quilt” I gave a brief description of patchwork and quilting. This article delves into the history of patchwork quilting.

Ancient Eygpt

The word quilt is derived from the Latin word Culcita, meaning a cushion or mattress that has been stuffed.

Patchwork and Quilting is thought to have been around as far back as 980 BC. A quilted funeral canopy was found in the tomb of the Egyptian queen Queen Esi-mem-kev, who was thought to have lived around 980 BC. Another example is a carved ivory figure discovered in 1903. It was a Pharaoh from the first dynasty of Egypt, (around 3400 BC) who is wearing what appears to be a quilted mantle.

A quilted rug was found in a Scythian chieftain’s tomb. (Koslow Scientific Expedition, 1924 to 1926). Carbon dating indicates the age to be around the 4th or 5th century B.C. and it is believed to be the oldest example of a quilted rug. Once cleaned it was seen to have a beautiful range of colours, soft blue and greens, rich reds and gold. It has an elaborate pattern which is still used in carpets today.

There are only a very few examples from these earlier dates but a good indicator that patchwork and quilting has been around for a very long time!

Medieval and Renaissance Europe

Only the odd item has been found from the medieval period but gives evidence of armour being made of quilted leather, linen padded with rags/straw/sheep’s wool and sometimes reinforced with metal. These were thought to have been worn by William the Conqueror and his Crusaders, not just for protection but also for warmth.

(Bayeux Tapestry scene51 Battle of Hastings Norman knights and archers” by Myrabella – Own work. Licensed under Public domain via Wikimedia Commons)

Bayeux Tapestry


In Europe, as the climate became colder the use of quilts for bedding became more popular. This gave rise to the development of embellishing simple cloth with design and decorative stitches. Pilgrims to America took this tradition of making quilts this way with them.

As time moved on to the Renaissance period, decorative quilted clothing became more popular and quilted bed covers were a luxury items used among the wealthy.

17th Century Onwards

From the 17th century onwards we know more about the history of patchwork quilting as more items have survived. The earliest surviving dated patchwork bedcover is known as the 1780 silk coverlet. It was discovered in 2000 and now belongs to the Quilters Guild of the British Isles. It has the initials E H and the date 1718 in the centre block but no details about the maker can be found. The blocks have motifs with flowers, hearts, pheasants, deer, cats, swans, lions and a unicorn and geometric designs. It is a beautiful piece of work, unfortunately due to copyright I can’t show it here but follow the link above and you can see it in all its glory!

Averil Colby

Averil Colby (1900–1983) was an influential quilter well known for her “foraging” of fabrics; an early upcycler! She believed that patchwork was a great way to teach hand sewing and didn’t believe in using a machine. When she died a collection of her items, which included a selection of floral fabrics was given to The Quilters Guild. It was her foraging for these fabric samples that helped historians date old quilts, most of which were never signed or dated. (http://www.quiltmuseum.org.uk).

The purpose of patchwork quilting started off for practical reasons. It’s gradually become one of the most popular sewing hobbies today with thousands of patchwork and quilting groups all over the world.

Quilting Bee

Doing the research into the history of patchwork quilting, plus seeing the many beautiful examples has inspired me to learn more about this wonderful hobby! If you want to try a simple patchwork baby quilt check out my How to Patchwork Quilt tutorial.

Nakshi_white quiltWoman sewing a patchwork quilt Geometric Patchwork Piece

FacebooktwitterredditpinterestFacebooktwitterredditpinterest

How to Patchwork Quilt – Part 3

FacebooktwitterredditpinterestFacebooktwitterredditpinterest

We finished How to Patchwork Quilt – Part 2 with the patchwork completed and now it’s time to move onto the quilting part.

There are many different ways to make a quilt but, for the purpose of this tutorial I’m doing it the simplest way.

Making the quilt.

A quick note here….3 layers of patchwork quiltI decided to add a cream strip along the top of the patchwork, (about 15/16 cm), the idea being I can embroider the baby’s name in the corner once he/she’s born.

Lay the batting/wadding on the bottom, then the patchwork facing up, then the backing.


Sew around 3 sides Open End of patchwork quiltleaving the top open. Trim the seam then turn right sides out leaving the batting in the middle.


Time to get the iron Patchwork quilt ironedout again! Turn the open edges in and give the quilt a good press. Top stitch all the way around the edge. You can use a contrasting thread colour for this, I kept it white as I don’t know whether it’s for a boy or girl.


Quilting.

As with the joining of the pieces, there are many different methods and patterns for the quilting part. You can see some elaborate examples in How to Quilt – Part 1

A lot will depend on the machine Patchwork quilt squareyou have and the thickness of the quilt. My sewing machine isn’t a quilting machine so I chose a simple straight machine stitch criss-crossed over a 4×4 square. Again I kept the white thread. It’s hard to see in the image but hopefully you get the idea.


Another press and finished! How to patchwork quilt finishedThis was the easiest patchwork quilt I could make, it’s a new skill for me to learn so always best to start simple! It’s not perfect, there are some “wobbly” bits but for a first attempt I’m pleased with it.


Finally.

I enjoyed the process and some of the examples I saw in my research have inspired me to do more. Proper quilting rulers would have made cutting the patchwork pieces easier. If you want to learn more about quilting and the best tools to us, take a look at this site.

FacebooktwitterredditpinterestFacebooktwitterredditpinterest

Brother cs6000i Computerized Sewing Machine

FacebooktwitterredditpinterestFacebooktwitterredditpinterest

After my recent foray into the world of patchwork quilting I decided to see what was on offer in the way of computerized sewing machines that are good for quilting. I found this excellent budget machine from Brother!

Brother cs6000i Computerized Sewing Machine

Functions and Features

 LCD Display:

Easy to see your stitch selection. brother cs6000i computerized sewing machine L


Adjustable sewing speed:brother cs6000i computerized sewing machine adjustable-sewing-

The stitch speed slide button lets you control the speed at which you want to sew.


Easy threading: brother cs6000i computerized sewing machine easy-threading

With a numbered diagram written on the machine threading is a breeze!


Oversized brother cs6000i computerized sewing machine over sized tabletable:

Perfect for quilts and larger items this oversized table gives you the space you need


Automatic needle threader: brother cs6000i computerized sewing machine automatic needle threader

No more fiddling around trying to thread a needle with this handy function.


Easy bobbin brother cs6000i computerized sewing machine bobbin winderwinding:

Again, there’s an easy to follow diagram.


As well as all the above there is:

  • Superbright work area.
  • Built-in free arm for sewing cuffs and sleeves.
  • 20 decorative stitches.
  • 20 stitches for garment construction.
  • 7 quilting stitches.
  • 6 Heirloom stitches.
  • 7 buttonhole styles. 

brother cs6000i computerized sewing machine stitches   

 Accessories.

The Brother CS6000i Computerized Sewing Machine comes with all the standard accessories as well as some great extras.

• Walking foot.

• Spring action quilting foot.

• Overcasting foot.

• Monogramming foot.

• Zipper foot.

• Zigzag foot.

• Blind stitch foot.

• Buttonhole foot.

• Button fitting foot.

• Seam ripper, needle set, cleaning brush, screwdriver, spool caps (3), spool pin, bobbins (3), eyelet punch.

Conclusion.

This Brother cs6000i Computerized Sewing Machine is suitable for experienced and beginner quilter with the great quilting features. As well as the oversized table the walking foot makes it smoother to feed multiple layers of fabric through the machine. The quilting foot helps you to get more accurate placement of quilting stitches and the quilting guide is for evenly spaced rows of quilting stitches.


Last but not least there is a 25yr limited warranty.

Buy the Brother CS6000i Computerized Sewing Machine here and get crafty!

Brother CS6000i 60-Stitch Computerized Sewing Machine


FacebooktwitterredditpinterestFacebooktwitterredditpinterest

How to Patchwork Quilt – Part 2

FacebooktwitterredditpinterestFacebooktwitterredditpinterest

In How to Patchwork Quilt – Part 1 we finished by having fabric squares prepared ready for piecing together.

How to Patchwork Quilt Part – 2

Lay out your squares in How to patchwork quilt squaresthe pattern you want. I decided to put the cream squares down the sides, I liked the look of it better.


We’ll sew the squares together How to patchwork quilt Sew Squaresone strip at a time. Take the first 2 squares and sew right sides together, then sew the next square on in the order you laid them out.


Keep adding the squares till How to patchwork quilt stripsyou have the first strip finished. Continue with each row of squares until you have all the rows sewn.


This is where you’ll see how Inaccurate cut squaresaccurate your square cutting was. You can see quite clearly in the picture on the right that my squares weren’t all created equally! I unpicked this particular block and cut another square of fabric.

I thought I was being careful and accurate when I cut out the squares so perhaps I need one of those special quilting rulers mentioned in How to Patchwork Quilt – Part 1….

After redoing that strip it was Patchwork Quilt pressed seamtime to trim the seams, switch the iron back on and press them open.


Join the strips.

Pin the strips, right sides Pin patchwork at seamstogether. I pinned right on the seams to make sure the seams lined up when sewing. (Click on the image to see full size).


All patchworked strips pinned


Sew all the strips together trying Patchwork Finishedto keep the seams aligned. Once you have all the strips sewn, trim and press.

You should now have a complete piece of patchwork!


Keeping the seams aligned Patchwork finishedwas the most challenging part. I’m sure this is one of those things where practice makes perfect. If you click to see the full size image you can see where my seams aren’t aligned perfectly but I’m pleased with what I’ve achieved so far.


How to Patchwork Quilt – Part 3 will cover making the quilt using the patchwork made in Parts 1 and How to Patchwork Quilt – Part 2. You’ll also have the opportunity to disguise mistakes made in the patchwork!

If you’ve any questions or comments about this tutorial please leave a comment below or contact me, I’d love to hear from you!

FacebooktwitterredditpinterestFacebooktwitterredditpinterest