Projects to Make

Sewing for Charity Projects

FacebooktwitterredditpinterestFacebooktwitterredditpinterest

Sewing for Charity Projects


sewing for charity projectsIf you’re anything like me and many others who enjoy sewing, you’re going to end up with a large stash of extra fabric and embellishments. Do you go to the craft store and buy reels of ribbon from the bargain bin, off cuts of fabric at 75% off? Charity shop bargains you plan to cut down and upcycle?

You walk into your craft/spare room and start to wonder what you’re going to do with it! Of course, this is all done with the best of intentions and your stash grows to mammoth proportions. Making things for charity is a great way to upcycle and use your stash, so I’ve come up with some sewing for charity projects.

There are numerous charity organizations all over the world that would be grateful to receive donations you’ve sewn yourself. Using your sewing skills this way is a win win situation, you get to do something you love and at the same time you’re helping those less fortunate than yourself.

There is a sewing for charity project out there that will fit your skills and which you’ll enjoy making. You could be a quilter, stuffed toy maker, make baby clothes and toys or just enjoy sewing generally! You can make items, like blankets or pillowcases, for use around the home, anything you might make for your friends and family you can make for a charity organization.

Quilts and Bedding


There are many charitable organizations who accept quilts and other bedding items which are handmade. These organizations range from your local homeless shelters to orphanages around the world. With a Google search you can find charities local to you; or larger organisations who organise shipments of useful items to places torn apart by war, catastrophic weather etc.

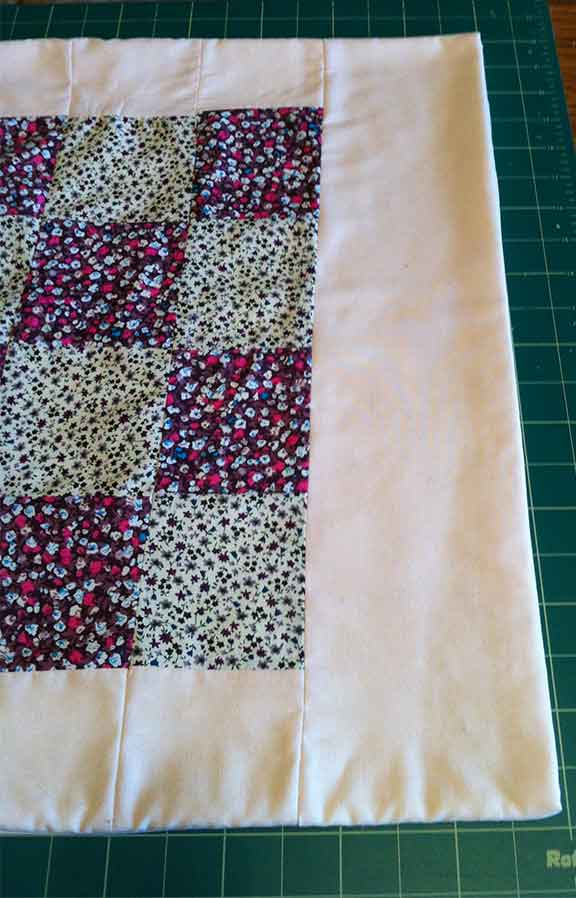
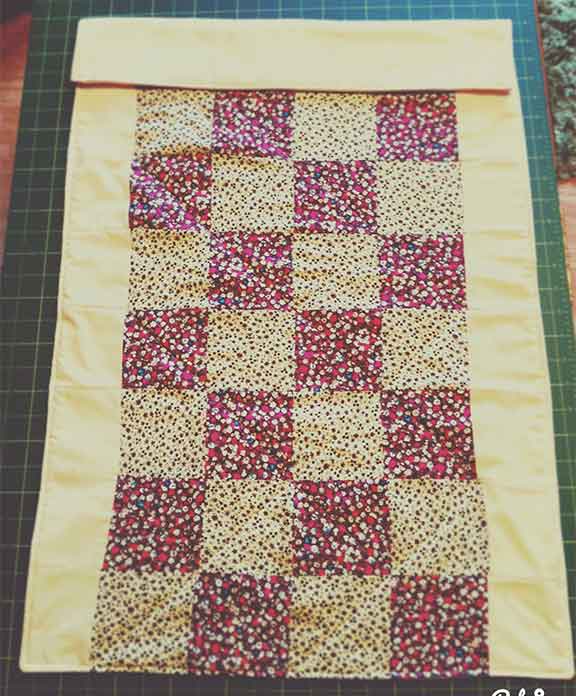
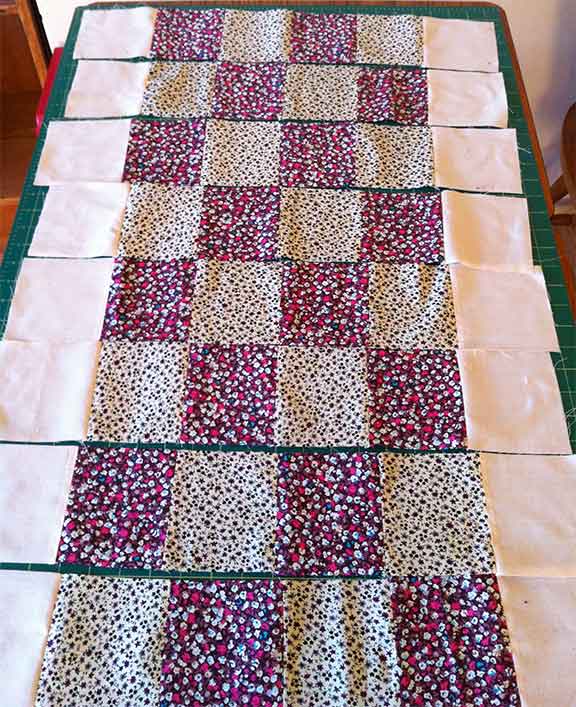
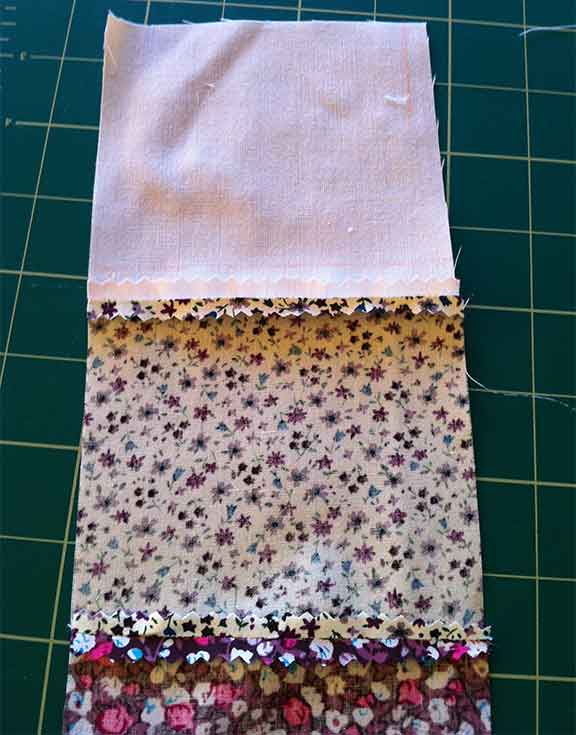
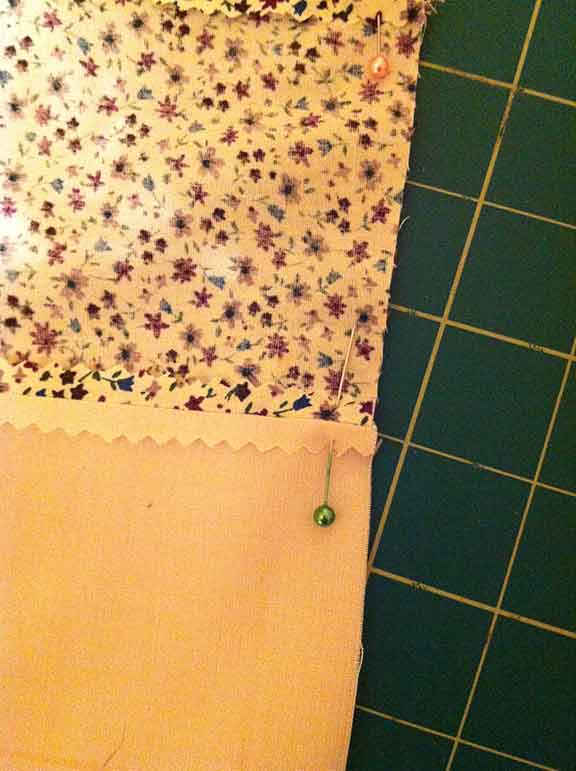
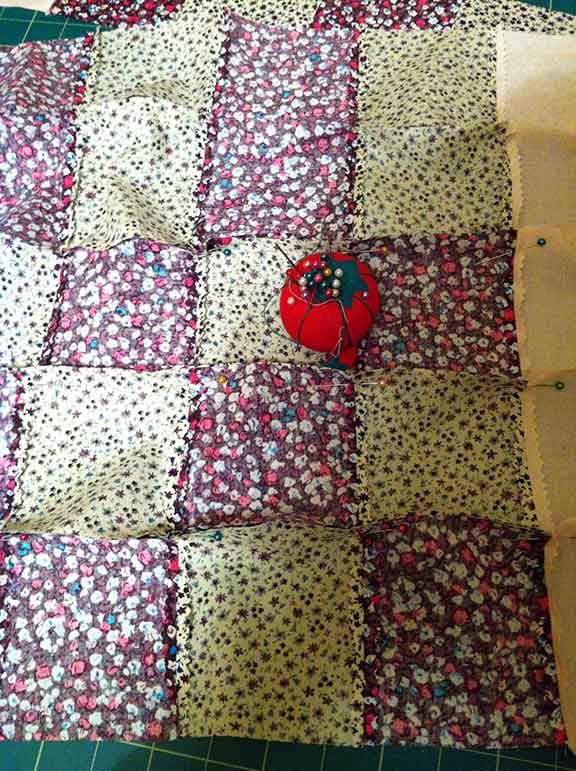
If you can sew 2 pieces of fabric together then you can make a scrap quilt or “crazy” quilt. These are made from a variety of fabric scraps like old clothing or fat quarters left from a project and are very easy to make. You don’t need any special sewing skills to make these and by following my simple tutorial you’ll have a useful patchwork quilt made in no time.

Another simple project is making pillowcases and I’ve found this great tutorial video (from the Missouri Quilt Company), making pillow cases for charity. I love the technique used to create the pretty trim!


Stuffed Toys and Fabric Books


fabric bookThere are charities all over the world that help neglected and abused children, donating toys and books is a great way to help. Sewing for a children’s organization is a wonderful opportunity to help others.

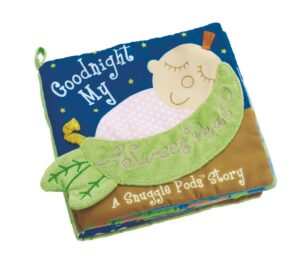
Some local police officers and fire fghters carry a supply these toys and books in their vehicles, ready to give comfort to children when a tragedy happens. Children’s toys can be simple to make; like this plush baby toy and handmade fabric books can be easy to sew too; as demonstrated in the video below.

Clothing Projects for Charity


pillowcase dress
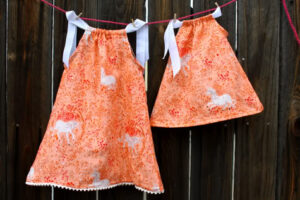
There are various types of clothing needed for charity which are easy to sew (and knit if you’re also a knitter). This article gives you 25 ways you can make a baby/toddler dress, including one from an old pillow case!

Search in your local directory for charities you can contact for donating your projects; and also for advice on what is needed more urgently.


Chemotherapy patients appreciate head coverings, and this article describes the importance for self-esteem during these debilitating treatments. Contact your local health authority to find the place to donate these items to. This is another “how to” video on how to make a simple head covering.


No matter what your sewing ability, or your financial status, you can sew (or knit) for charity. Whether you make crazy quilts out of old cast-off clothing, or you make chemotherapy caps for cancer patients, your items will be used and appreciated. So why not start today, dig into your stash and start sewing for charity.

I’d love to hear about you your sewing for charity projects so feel free to leave a comment below or contact me and I’ll update this post with your creations.

FacebooktwitterredditpinterestFacebooktwitterredditpinterest

Easy Make Burp Cloths

FacebooktwitterredditpinterestFacebooktwitterredditpinterest

Baby Lilly needs burp cloths, she goes through so many! I made this project up as I went along but they really are “easy make burp cloths!” I followed the same simple method that I used for the taggie blanket, only difference being I didn’t add the tags. I made 2 and it only took me 30 mins, including the ironing.


Materials 


make burp cloths

I used some face/wash cloths my Mum gave me when she was having a clear out for the back. A simple square shape and perfect for making a burp cloth. For the top I had a couple of fat quarters left from the bundle I’d bought for a previous project.


Instructions


iron fabricFirst, most important, iron your fabric. I repeat this on every tutorial because I used to take shortcuts and think it didn’t matter, wondered why pattern pieces were the wrong size! Another tip, keep your iron clean and if its past it’s best and keeps sticking, think about replacing. There’s nothing more annoying than ruined fabric because of sticky iron.


Fabric pinnedLay your fabric on the table right side up then pin the face cloth to it. Cut around the edge so you have equal size square of face cloth and fabric. I didn’t bother getting the rotary cutter and cutting mat out for this small project, just used the ironing board and scissors.

Do you like my cute pin cushion? My sis crocheted it for a Christmas present, I love it!


trimmed burp clothsYou’ll now be ready to get straight to the sewing, your fabric is already pinned from the previous cutting step. Sew 3 side and halfway up the 4th leaving an opening for turning right sides out.

Trim the cotton edges with pinking shears to stop fraying. The face cloth already has bound edges so won’t need to be trimmed. I could have taken my overlocker/serger round the edges at the start but wanted to demonstrate how you could make this with basic tools and a basic sewing machine.


Turn the fabric right sides out through the gap left in the previous step. Press, turning in the ends of the open gap then top stitch all the way round.


easy make burp cloths

I plan to run up some more this week, make sure Lilly has a good supply!

If you’ve any questions or suggestions feel free to contact me, or leave a comment below.

FacebooktwitterredditpinterestFacebooktwitterredditpinterest

How to Go Green at Home

FacebooktwitterredditpinterestFacebooktwitterredditpinterest

I’ve slipped a disc in my back and can’t do any sewing projects to share with you at the moment. I thought I’d take some time to post about how to go green at home with these great upcycling ideas.

Milk formula cans

What do you do with your upcycled baby formula cans
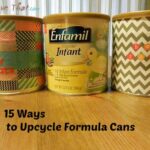
baby formula cans? If you imagine the amount of baby cans just being dumped and the years it takes for them to break down, that’s a pretty big pile of cans! There’s a pile of good ideas on the Internet, can bowling was one I found here. There are 15 ways to upcycle your baby cans, no excuse for adding them to landfill!

Upcycled sweaters

If you have young children upcycled sweater slipper
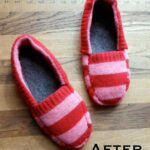
and babies then in winter you probably spend a lot of time in the house. How about making yourself some toastie slippers from an old jumper. In Scotland we get very cold winters, once my back is better I’ll be making a pair! I’m loving this idea and you’ll find the tutorial for upcycled sweater slippers here.


Christmas stockings Christmas Stocking from old jumper
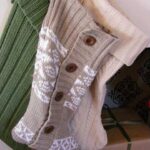
can also be made from old sweaters and it’s just the right time of year for making them. It’s a time when people have clear-outs and also prepare for Christmas, perfect! You can find the tutorial here, a great blog about imperfect home making!


Another good upcycled Upcycled sweater cup holder
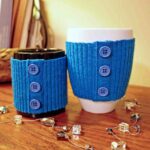
sweater idea are these cup holders. You could incorporate a sweater pocket and use it for popping a biscuit in! I found these here, a blog with some pretty cool ideas.


Tin cans

We all use tin cans at some upcycled food canstime or another and there are some great ways to upcycle them. The most common on is as a pencil holder, I’m sure you’ve seen these at some point! This blog has some great ideas, from a simple plain can with the edges smoothed down to the more elaborate organizer in the picture.


Baby food jars

I don’t use them so much these days with my kids being all grown up but there are lots of ways to upcycle them. I make jam and chutneys and found this size ideal when making little gift hampers. I’ve also used them in the garage to keep those screws and nails organized.


There’s some really upcycled tin caddycool ideas like these tree lanterns at inhabitots.


Let me know your upcycling ideas for how to go green at home. You can comment below or contact me I’d love to hear from you!

FacebooktwitterredditpinterestFacebooktwitterredditpinterest

Last Minute Handmade Christmas gifts

FacebooktwitterredditpinterestFacebooktwitterredditpinterest

There’s still time to make gifts for family and friends so here is a reminder of some of my tutorials. These are simple enough for those those last minute handmade Christmas gifts. Most of these projects can be made with things you already have in the home. You can also get my free ebook which has 3 easy tutorials for you to follow. Just enter your name and email to the subscribe form on the right to get your FREE ebook!

Baby Toys to Make.

If you’ve had experience with babys then you’ll know they like the simple things best.

The most popular one Baby Lilly holding taggie blanket
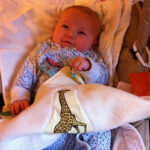
I’ve made has been the
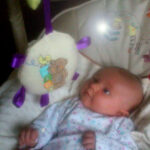
 taggie blanket, babys just love it! For extra texture, instead of the animal applique you can sew on some different scraps of fabric, velvet, seersucker, a piece of hook and loop, felt etc. You can also make them smaller or bigger, even pram blanket size.


Made with the same base fabric Baby Lilly with plush baby toyis this plush baby toy. A little bit trickier to make as you’re sewing in a circle but still simple enough for a beginner. This is another one you can adapt and if you struggle to sew a circle then just make it a square!


 Useful Baby Gifts to Make

One of the most useful things Diaper Bag
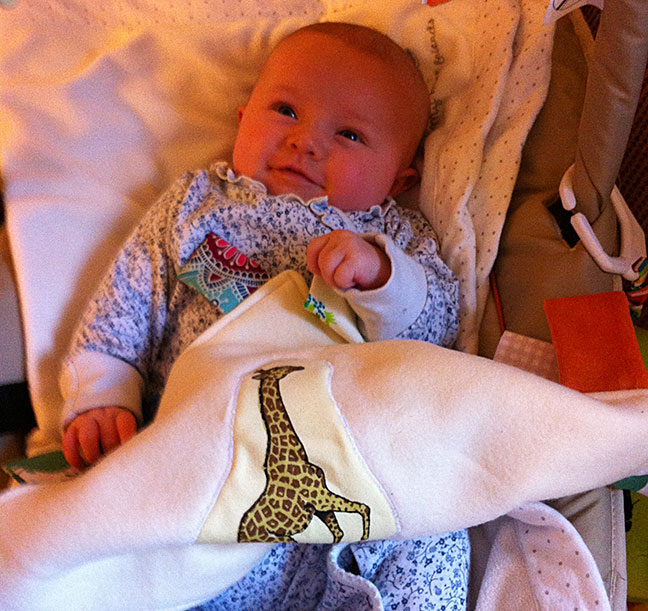
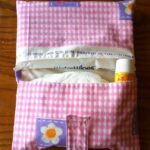
I’ve made which, according to baby Lilly’s Mum, is the diaper bag. This has been in constant use since Lilly was born!


A christmas bib is Baby christmas dress and matching bib
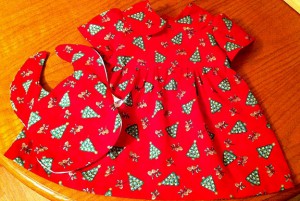
something you could make with festive fabric. Follow the bandana bib tutorial here, I did one to match the baby christmas dress I made.


My recent post, “How to Patchwork Quilt” How to patchwork quilt finished
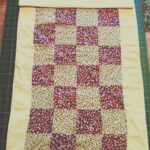
showed you how to make a pram quilt. This would make a beautiful gift and could even become a family heirloom!


Other Gift Ideas

One of the simplest things to Handmade bookmarkmake is this handmade bookmark, you’ll find a tutorial here. These suit all ages and can be customized to suit the person you’re making them for. Adapt the pattern slightly by doing a square shape and filling with lavender or other aromatic herbs.


A festival/utility belt can be made Festival Belt
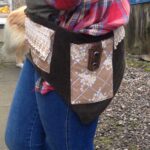
for all ages but the young ones love them for taking to festivals!


These are just a few ideas for easy homemade Christmas gifts. Have a look through my “projects to make” category for more ideas. You can also check out my “projects to try” Pinterest board for more ideas.


And lastly, if you do need any supplies check out these links.

HAPPY SEWING!

FacebooktwitterredditpinterestFacebooktwitterredditpinterest

How to Patchwork Quilt – Part 3

FacebooktwitterredditpinterestFacebooktwitterredditpinterest

We finished How to Patchwork Quilt – Part 2 with the patchwork completed and now it’s time to move onto the quilting part.

There are many different ways to make a quilt but, for the purpose of this tutorial I’m doing it the simplest way.

Making the quilt.

A quick note here….3 layers of patchwork quiltI decided to add a cream strip along the top of the patchwork, (about 15/16 cm), the idea being I can embroider the baby’s name in the corner once he/she’s born.

Lay the batting/wadding on the bottom, then the patchwork facing up, then the backing.


Sew around 3 sides Open End of patchwork quiltleaving the top open. Trim the seam then turn right sides out leaving the batting in the middle.


Time to get the iron Patchwork quilt ironedout again! Turn the open edges in and give the quilt a good press. Top stitch all the way around the edge. You can use a contrasting thread colour for this, I kept it white as I don’t know whether it’s for a boy or girl.


Quilting.

As with the joining of the pieces, there are many different methods and patterns for the quilting part. You can see some elaborate examples in How to Quilt – Part 1

A lot will depend on the machine Patchwork quilt squareyou have and the thickness of the quilt. My sewing machine isn’t a quilting machine so I chose a simple straight machine stitch criss-crossed over a 4×4 square. Again I kept the white thread. It’s hard to see in the image but hopefully you get the idea.


Another press and finished! How to patchwork quilt finishedThis was the easiest patchwork quilt I could make, it’s a new skill for me to learn so always best to start simple! It’s not perfect, there are some “wobbly” bits but for a first attempt I’m pleased with it.


Finally.

I enjoyed the process and some of the examples I saw in my research have inspired me to do more. Proper quilting rulers would have made cutting the patchwork pieces easier. If you want to learn more about quilting and the best tools to us, take a look at this site.

FacebooktwitterredditpinterestFacebooktwitterredditpinterest

How to Patchwork Quilt – Part 2

FacebooktwitterredditpinterestFacebooktwitterredditpinterest

In How to Patchwork Quilt – Part 1 we finished by having fabric squares prepared ready for piecing together.

How to Patchwork Quilt Part – 2

Lay out your squares in How to patchwork quilt squaresthe pattern you want. I decided to put the cream squares down the sides, I liked the look of it better.


We’ll sew the squares together How to patchwork quilt Sew Squaresone strip at a time. Take the first 2 squares and sew right sides together, then sew the next square on in the order you laid them out.


Keep adding the squares till How to patchwork quilt stripsyou have the first strip finished. Continue with each row of squares until you have all the rows sewn.


This is where you’ll see how Inaccurate cut squaresaccurate your square cutting was. You can see quite clearly in the picture on the right that my squares weren’t all created equally! I unpicked this particular block and cut another square of fabric.

I thought I was being careful and accurate when I cut out the squares so perhaps I need one of those special quilting rulers mentioned in How to Patchwork Quilt – Part 1….

After redoing that strip it was Patchwork Quilt pressed seamtime to trim the seams, switch the iron back on and press them open.


Join the strips.

Pin the strips, right sides Pin patchwork at seamstogether. I pinned right on the seams to make sure the seams lined up when sewing. (Click on the image to see full size).


All patchworked strips pinned


Sew all the strips together trying Patchwork Finishedto keep the seams aligned. Once you have all the strips sewn, trim and press.

You should now have a complete piece of patchwork!


Keeping the seams aligned Patchwork finishedwas the most challenging part. I’m sure this is one of those things where practice makes perfect. If you click to see the full size image you can see where my seams aren’t aligned perfectly but I’m pleased with what I’ve achieved so far.


How to Patchwork Quilt – Part 3 will cover making the quilt using the patchwork made in Parts 1 and How to Patchwork Quilt – Part 2. You’ll also have the opportunity to disguise mistakes made in the patchwork!

If you’ve any questions or comments about this tutorial please leave a comment below or contact me, I’d love to hear from you!

FacebooktwitterredditpinterestFacebooktwitterredditpinterest

How to Patchwork Quilt

FacebooktwitterredditpinterestFacebooktwitterredditpinterest

I don’t know how to patchwork quilt so take this journey with me and we’ll work together to create a patchwork pram quilt. I have another Grandbaby on the way and thought this would make a great gift. There are plenty of tutorials and advice, I’ve already done my research, and am ready to get started!

I’m going to do this ‘How to patchwork quilt’ tutorial in 3 parts. This will give us time to complete each part before moving onto the next.

I have the materials that I need having taken advantage of the special offer from Hobbycraft (see here) and buying the half price fat quarters (Fat quarters are usually 56cm wide x 50cm, (22 inches x 18 inches)). I’m using an unwanted quilt cover for the backing and some of the patchwork squares.

What is a Patchwork Quilt?

A quilt is described Elaborate Quilt
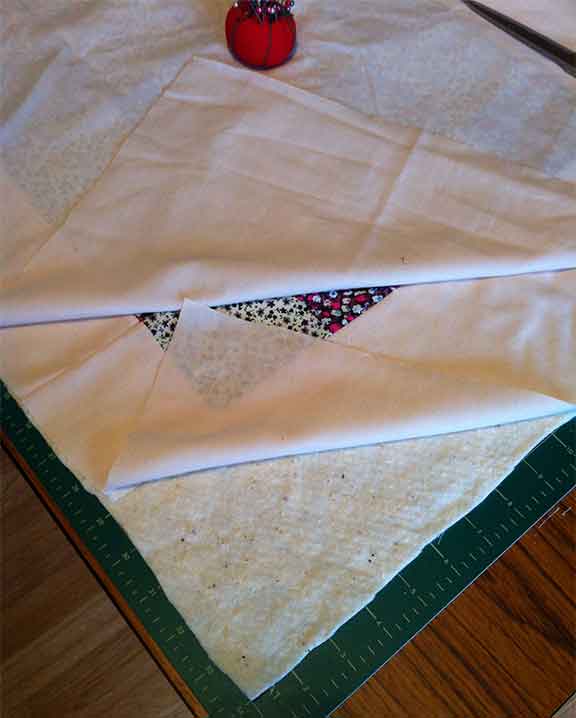
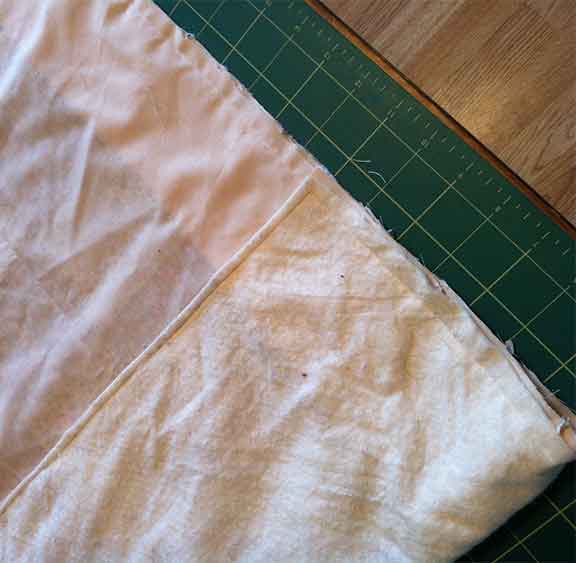
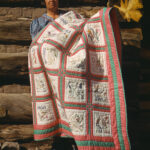
as being a type of blanket composed of three layers. A top layer, a layer of batting or wadding in the middle and a fabric back. Quilting is where the layers are stitched together with either simple or very elaborate patterns. (Image “Russellquiltera” by Russell Lee Courtesy of Wikipedia)

Patchwork is described as simple patchwork
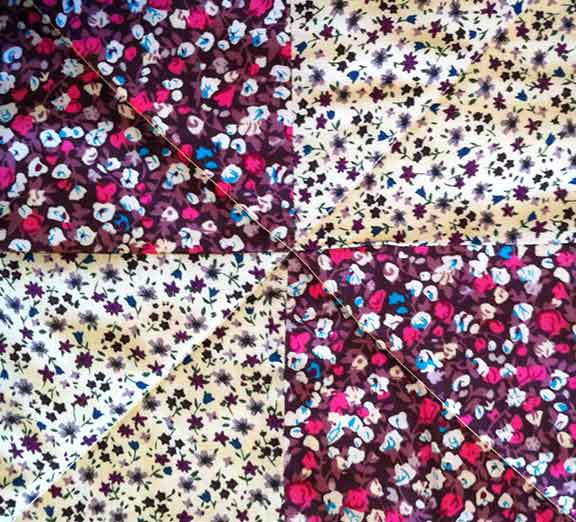
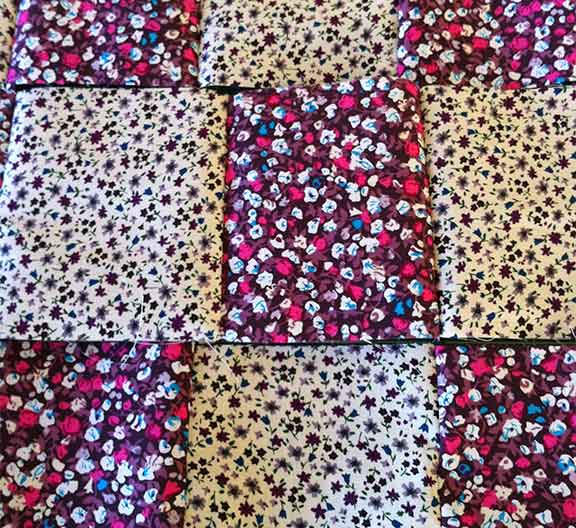
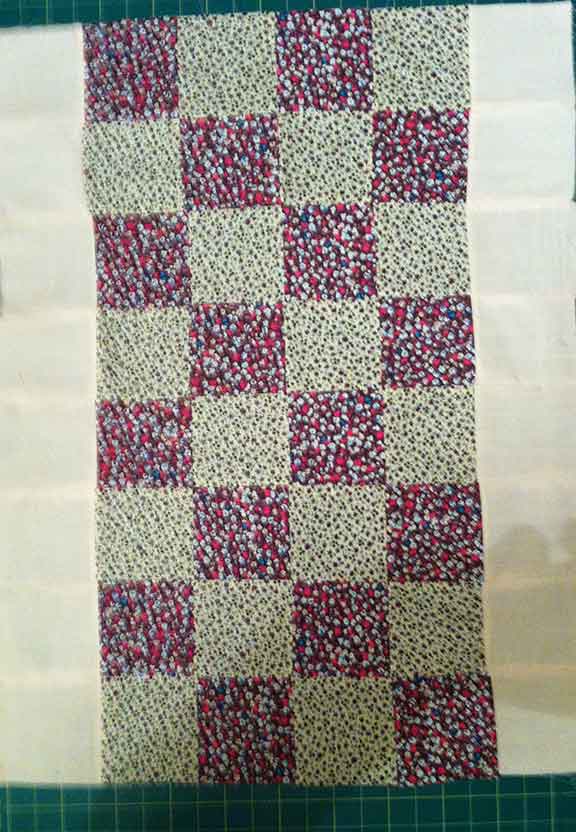
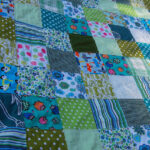
needlework that involves sewing geometric pieces of fabric together to form a large piece. Generally the larger piece is based on repeating patterns built up with the fabric shapes. The simplest form is squares, which you can see in this image.


So, a patchwork quilt is using the pieced patchwork to form the top layer of your quilt.

Of course, there is much Elaborate quilt
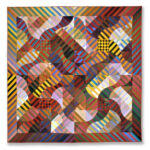
more to this kind of sewing. There are some beautiful examples like the picture on the right. (“Korea-Joseon-Bojagi-01” by by angela n.)

I’m keeping it simple for my first attempt by using a basic square patchwork.


Lets get started.

Based on an existing pram cover I’ve decided to make my pram quilt 61cm x 81.4cm (24″ x 32″) with each square being 10cm (4″)

If I’ve done my calculations correctly that means I’ll need 48 squares. There’ll need to be a seam allowance added so I’ll add 1.27cm (1/2″) to each square.

Materials.

  • A piece 61cm x 81.4cm (24″ x 32″) How to quilt materialsfor the backing.
  • A piece of wadding/batting 61cm x 81.4cm((24″ x 32″).
  • Colourful fabric for cutting the squares. I’m using two of the fat quarters mentioned earlier plus a one fat quarter cut from the backing. So that’s three fat quarters.
  • Rotary cutter and self-healing mat (optional, you can use scissors).

Instructions.

The next step is vey important; IRON YOUR FABRIC! For accuracy when sewing the squares together this needs to be done. You’ve cut out your backing and wadding piece so now it’s time to cut out the squares. There are special patchwork and quilting rulers for this, like this one here Sew-Easy Patchwork Quilting Ruler 24×6-1/2in. I don’t have one of these so I’m going to mark out the squares with tailors chalk and a mitred ruler.

Lay the three fat quarters on top of each Fabric choiceother and mark out 48 x 11.27cm (4.4″)squares.


Measuring the squares


Once you have all the squares Fabric Squares Cut outmarked out it’s time to start cutting. Cut along the long length first. You’ll then have 4 separate lots of fabric. Cut along the markings you made earlier to form the squares.

You should now have 48 neatly cut squares ready to start forming the patchwork.


The next step is to lay out the squares in the pattern you want to sew them. That will be covered in Part 2 of How to Patchwork Quilt.

I’m really enjoying learning and will definitely want to do more patchwork quilting. I found this great resource where you can download all the quilting patterns you want – it’s FREE!

If you have any questions or comments about this tutorial please comment below or contact me.


FacebooktwitterredditpinterestFacebooktwitterredditpinterest

Baby Christmas Dress

FacebooktwitterredditpinterestFacebooktwitterredditpinterest

I was thinking about making a baby Christmas dress for Granddaughter Lilly and wondering about fabric when this appeared at my door. 

Christmas Curtains
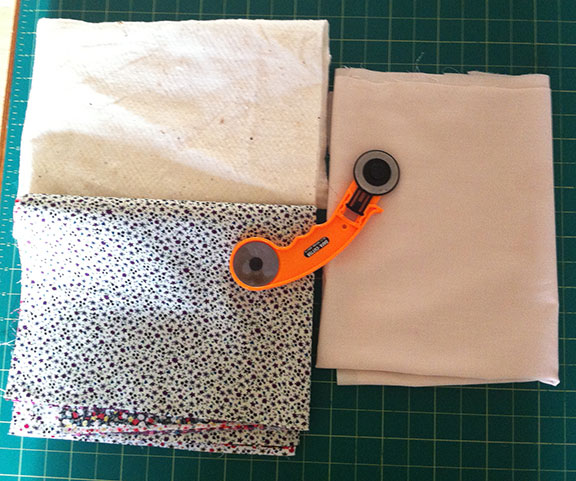
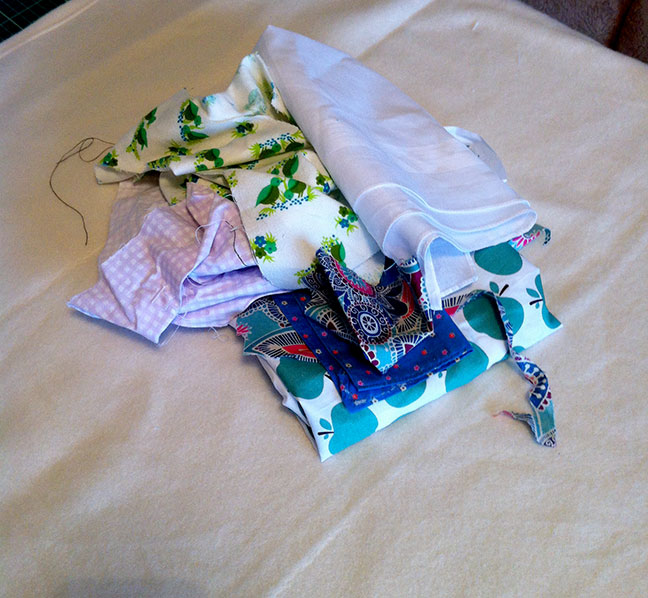
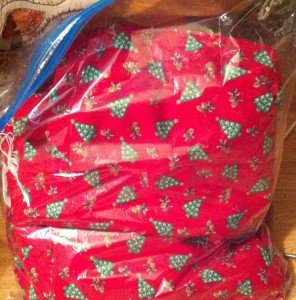
A bag full of curtains!

There were four pairs of curtains in the bag, all lined with red fabric. I didn’t take measurements but there was a LOT of fabric in there!


Unpicking

First was the job of unpicking, Unpicking the fabric
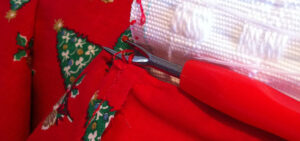
I like to reuse as much as possible so the curtain tape came off first. That will get saved in my haberdashery box for future use.


Then I separated the lining. Christmas Fabric
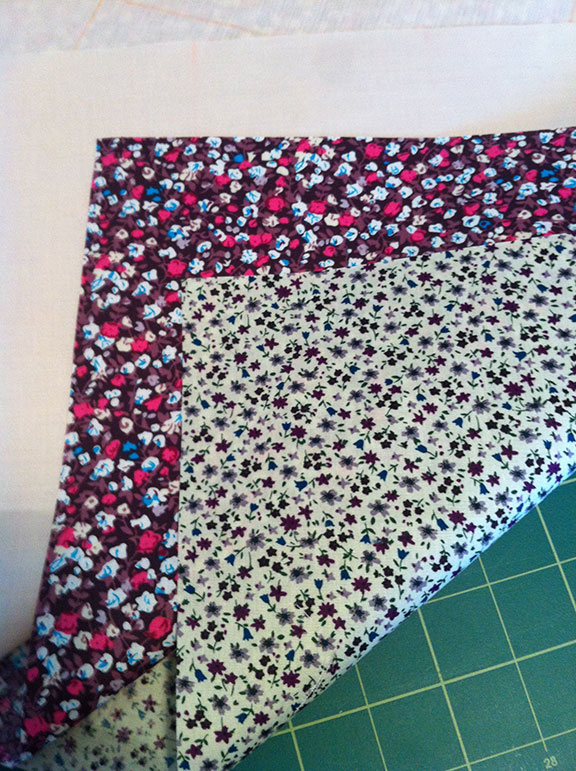
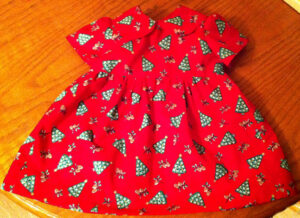
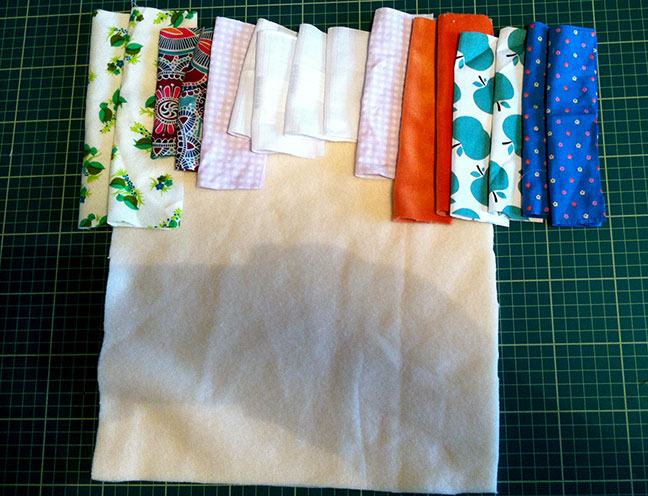
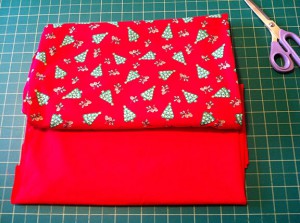
I’ll only be using the printed fabric for this baby Christmas dress and will hardly use even 1 of the curtains. Enough to make a dress each year as baby Lilly grows!
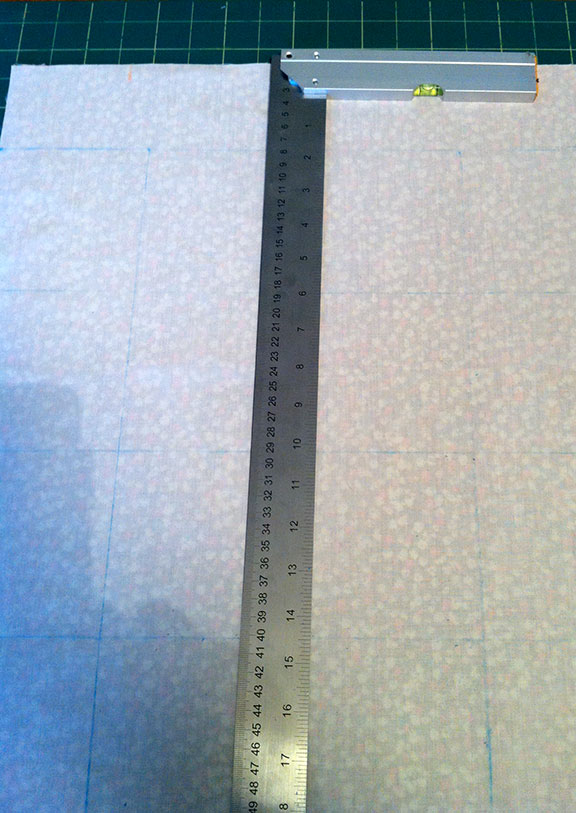
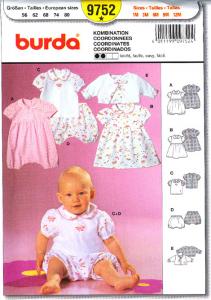


Making the Dress

Then it was time to start making Baby dress patternthe dress. I used a BurdaStyle pattern, 9752 which gives a few different options on style.

Following the instructions I pinned the pattern onto the fabric. There’s a tutorial here for how to read sewing patterns.


I usually find Burda patterns easy Sewing the Collar
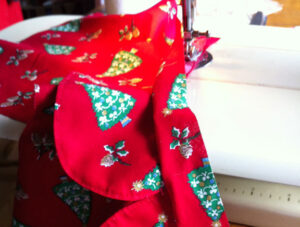
to follow but the collar on this on really had me stumped. I spent a long time trying to figure it out but after a bit of trial and error and the help of a sewing forum I got there.

I used to have a problem inserting sleeves but have finally mastered that skill!


This is the top half of the Top Half of dress
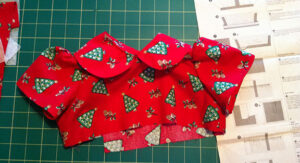
dress finished ready for attaching the skirt.


The skirt was straight forward with a simple gather around the waist. I’ve used this technique on many baby dresses and will be posting a “how to” tutorial soon. It gives a nice fullness to the skirt and makes sure there’s plenty of room around baby’s hips.

Baby Christmas Dress Finished!

Because of the problems I had with the collar this took me around 8 hrs to make. I did manage to run up a matching bib in that time though. Now Lilly will have this cute baby Christmas outfit to wear over her first festive season!

baby christmas dress

Baby Christmas dress Baby Christmas dress

FacebooktwitterredditpinterestFacebooktwitterredditpinterest

Taggie Blanket

FacebooktwitterredditpinterestFacebooktwitterredditpinterest

A baby taggie blanket can be so expensive taggie blanket
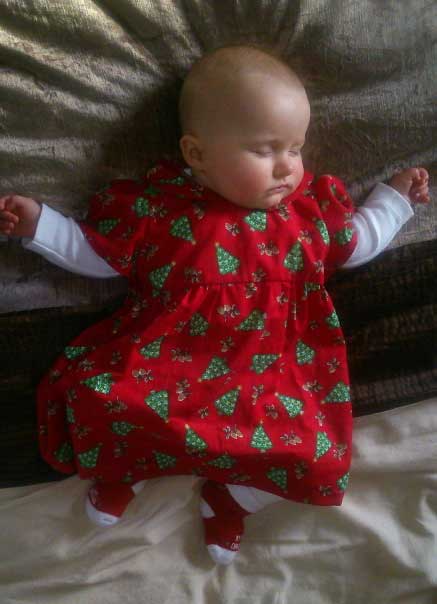
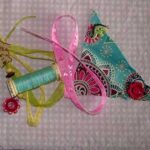
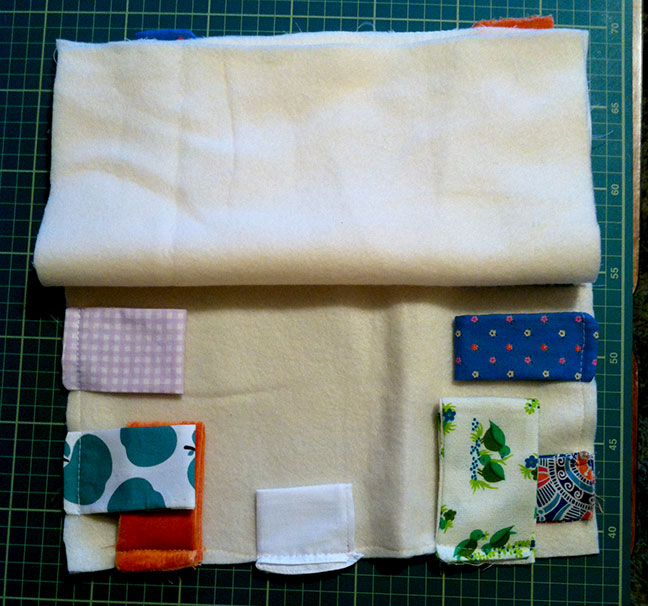
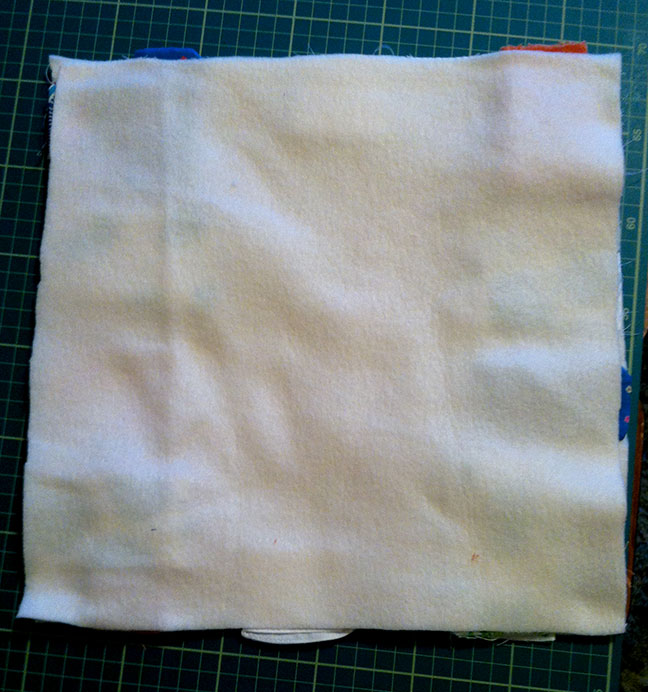
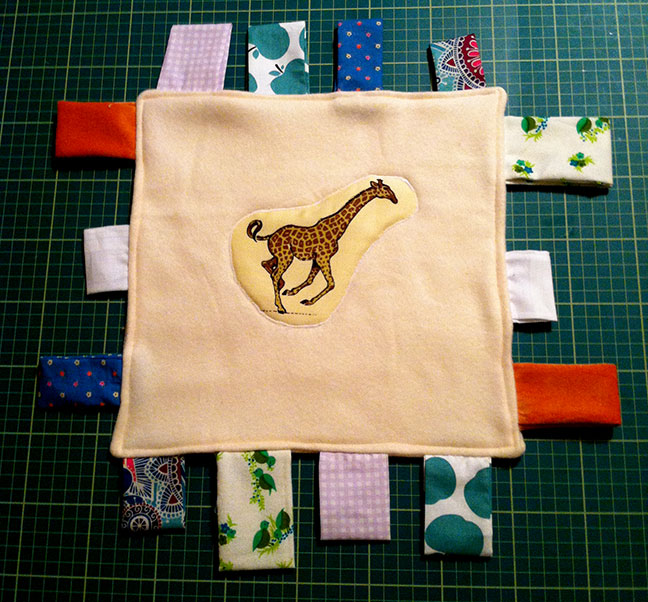
to buy, so why not have a go at making one? These are simple to make and don’t take long. A beginning sewer can easily manage this project. Making a taggie blanket uses up your fabric scraps too.

I’ve explained all the techniques used in this project in previous articles. Just click on the blue links if you need help.

I used microfiber fleece for the main part of the Taggie Blanket. You could also use pretty print cotton fabrics like fat quarters but, if you’ve read my other tutorials, you know I prefer the microfibre fleece. I’ve already made three pair of baby booties and a plush baby toy from it. Why? It’s very soft and feels so good on baby’s (or anyone else’s) skin.

fat quartersHobbycraft have some special half price offers on some very pretty fat quarters.


Materials

  • 2 pieces of micro fleece 30cm x 30cm (12″ x 12″)
  • 14 fabric scraps of differing sizes. (I used different textures to make it more tactile)
  • Thread
  • Scissors


Making the tags

Once you have all you materials, take the scrapsMaterials for Taggie Blanket first and cut into rectangles of various sizes. Remember these will be getting folded in half and sewn so allow for this. My largest piece was 10cm x 15cm (4″ x 6″)


Fold each piece in half lengthwise right Tags cut and pressedsides together and press till you have 14 tags ready to sew.


Sew two sides leaving one side open Sewing the Seamsfor turning right sides out.


Turn all pieces right side out and pressIron the tags. I pressed the seams to the side but you can press seams to the centre if you prefer.


Putting it together

Fold the tags in half and lay on 1 of thePin tags on fleece pieces of fleece with the folded ends facing the centre. Space them out as shown in the picture and pin in place.If you’re using fabric pin the tags to the right side.


Baste/tack in place, you can find an Sew Tags onto fleeceexplanation of basting here. Take the second piece of fleece and lay on top of the basted pieces. If you’re using print fabric remember to place the right side down.


All pieces placed togther ready for sewing


Stitch around all 4 sides leaving a gap Right sides out and pin open endfor turning right sides out. Turn right sides out then turn in and pin the open end.


Top stitch around the edge to give a nice Top stitchneat finsh.


The fleece centre looked a bit plain to me Baby taggie blanketso I thought I’d try my new found applique skills. I had an old charity shop cushion cover with animals printed on it so I cut out the giraffe for this project.


And there we are, I think baby Lilly likes her new taggie blanket!

Baby Lilly holding taggie blanket


FacebooktwitterredditpinterestFacebooktwitterredditpinterest

I have Fabric Scraps, what shall I make?

FacebooktwitterredditpinterestFacebooktwitterredditpinterest

I was thinking the I have fabric scraps, what shall I make?other day, “I have fabric scraps,
what shall I make?” I’m sure most crafters have the same dilemma, what to do with fabric scraps! My daughter asked if I’d ever tried applique and suprisingly enough I hadn’t. I’ve heard the word in sewing circles but never really given it any thought so went Googling to learn more about it.


This is what Wikipedia has to say about it:

In its broadest sense, an appliquéApplique image from Wikipedia 
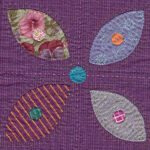
is a smaller ornament or device applied to another surface. An appliqué is usually one piece. In the context of ceramics, for example, an appliqué is a separate piece of clay added to the primary work, generally for the purpose of decoration. The term is borrowed from French and, in this context, means “applied” or “thing that has been applied.” Appliqué is a surface pattern that is used to decorate an aspect of a garment or product. It is highly used with the Textiles industry, but lately is a key trend for make do mend items.”

Ah, “make do and mend items” perfect for my upcycled projects! So, off I went Googling and found a ton of stuff about Applique and how to use fabric scraps. There were tutorials, videos and thousands of images! I work better following text and pictures but will occasionally use a video to help when I first start learning a new craft.

Having done my research it was time to have a go.

I decided to use some of my scrappiest fabric scraps for a trial,Fabric scrap pieces and interfacing cut out ready to press 
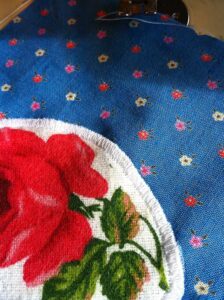
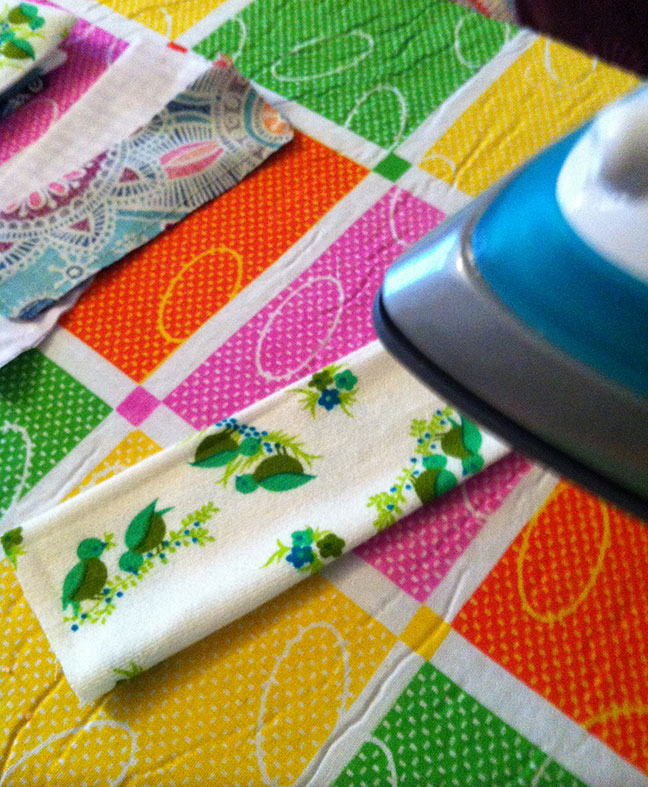
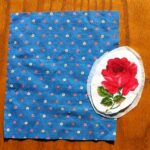
I didn’t want to waste some of the prettier pieces. I followed the instructions on one of the tutorials I’d found and got my pieces ready for pressing. I decided not to do a complicated shape for my first go and figured an oval shape shouldn’t be too challenging.


After pressing the the pieces together prepared applique on sewing machine ready for sewing.
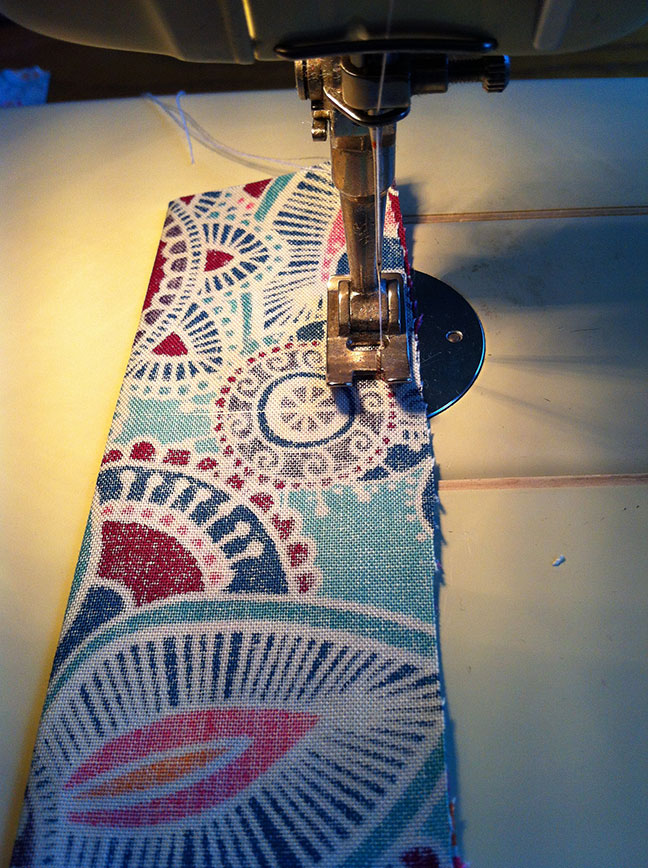
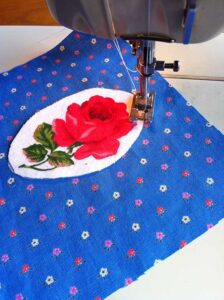
it was time for the sewing. You can do this by hand and there are plenty of tutorials explaining how to. I used my machine as it has the decorative stitches. I chose to use a zig zag stitch quite close together. It was tricky keeping the stitching exactly in place moving round in a curve but I got better as I went along.


I thought it looked not too bad for a first attempt! One thing I did learn that wasn’t in the tutorial, make sure your bobbin is full. Mine ran out halfway round the flower and you can see where I’ve rejoined.

Fabric scrap applique first attempt complete

I haven’t shown the messy bit in the photo!


Back to the question “I have fabric scraps, what shall I make?”, I wanted to use applique for something useful. I’ve already written a tutorial on how to make baby bibs so decided to try and add applique to one. Again, I used the scrappiest fabric in my stash and quickly ran up a baby bib. I used the flower fabric scrap in first attempt and cut a square this time.Completed applique bi made with fabric scraps

It was challenging going round the corners but I’m sure I’ll become better with practice.

I’ve got all sorts of ideas now. Animals on bibs are popular and nature scenes would also work. The little dresses I’ve made with plain fabric would look great with some applique. In fact, you could apply it to any project!


Sometimes you might have a specific project in mind and need to purchase small pieces of fabric. Hobbycraft do a great selection of fat quarters with some really pretty fabrics. I also found some lovely fabric at Create for Less in the US

So the next time I ask “I have fabric scraps, what shall I make” I’ll know the answer!

HAPPY SEWING!


FacebooktwitterredditpinterestFacebooktwitterredditpinterest