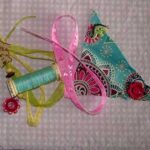
Sewing for Charity Projects
Sewing for Charity Projects If you’re anything like me and many others who enjoy sewing, you’re going to end up … Read more
Sewing for Charity Projects If you’re anything like me and many others who enjoy sewing, you’re going to end up … Read more

I don’t know how to patchwork quilt so take this journey with me and we’ll work together to create a … Read more
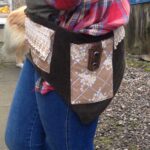
Ever seen a cool looking festival/utility belts, you easily make your own with an old pair of trousers and scraps of … Read more