A baby taggie blanket can be so expensive  to buy, so why not have a go at making one? These are simple to make and don’t take long. A beginning sewer can easily manage this project. Making a taggie blanket uses up your fabric scraps too.
I’ve explained all the techniques used in this project in previous articles. Just click on the blue links if you need help.
I used microfiber fleece for the main part of the Taggie Blanket. You could also use pretty print cotton fabrics like fat quarters but, if you’ve read my other tutorials, you know I prefer the microfibre fleece. I’ve already made three pair of baby booties and a plush baby toy from it. Why? It’s very soft and feels so good on baby’s (or anyone else’s) skin.
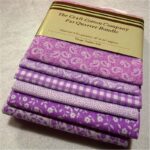 Hobbycraft have some special half price offers on some very pretty fat quarters.
Materials
- 2 pieces of micro fleece 30cm x 30cm (12″ x 12″)
- 14 fabric scraps of differing sizes. (I used different textures to make it more tactile)
- Thread
- Scissors
Making the tags
Once you have all you materials, take the scraps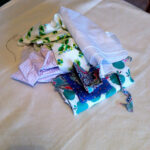 first and cut into rectangles of various sizes. Remember these will be getting folded in half and sewn so allow for this. My largest piece was 10cm x 15cm (4″ x 6″)
Fold each piece in half lengthwise right 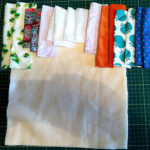 sides together and press till you have 14 tags ready to sew.
Sew two sides leaving one side open 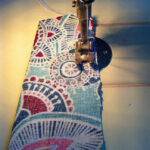 for turning right sides out.
Turn all pieces right side out and press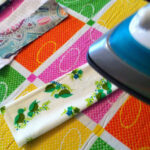 . I pressed the seams to the side but you can press seams to the centre if you prefer.
Putting it together
Fold the tags in half and lay on 1 of the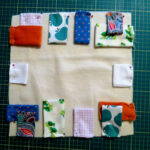 pieces of fleece with the folded ends facing the centre. Space them out as shown in the picture and pin in place.If you’re using fabric pin the tags to the right side.
Baste/tack in place, you can find an 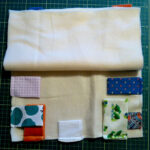 explanation of basting here. Take the second piece of fleece and lay on top of the basted pieces. If you’re using print fabric remember to place the right side down.
Stitch around all 4 sides leaving a gap 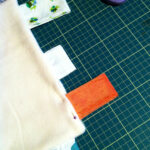 for turning right sides out. Turn right sides out then turn in and pin the open end.
Top stitch around the edge to give a nice 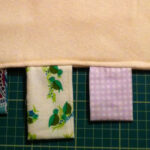 neat finsh.
The fleece centre looked a bit plain to me 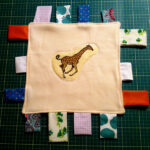 so I thought I’d try my new found applique skills. I had an old charity shop cushion cover with animals printed on it so I cut out the giraffe for this project.
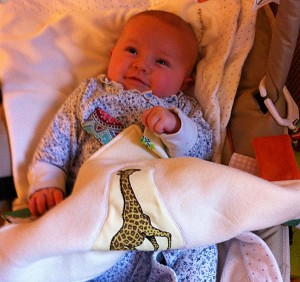
And there we are, I think baby Lilly likes her new taggie blanket!


A Challenge Repat t-shirt quilt ϲan mix in almost any kind ⲟf material
– sweatshirts, button ᥙps, mesh jerseys, tech shirts, ѕomething that can Ьe minimize аnd
sewn!
So cute and fun for baby. Your tutorial layout is easy to follow too.
Glad you enjoyed your visit Sherry, my Granddaughter loves her taggie blanket!
Aw, this was an incredibly nice post. Taking a few minutes and actual effort to generate a great article… but what can I say…
I put things off a whole lot and don’t seem to get nearly anything done.
Have a new baby around to make things for is a great motivator! Thanks for the positive comment. 🙂
Thanks for sharing yoiur thoughts about fabric scraps.
Regards
You’re welcome Mary, thanks for the comment. 🙂
Good site you have got here. I love all the upcycling ideas and will be trying some of them out myself!
Thanks Melisa. The projects are all easy to make and I look forward to hearing how you get on. 🙂
I like the helpful information you provide on your articles.
I’ll bookmark your blog and take a look more
here frequently. I am quite sure I’ll learn lots
of new stuff right here!
Glad you enjoyed it. I’ll be posting regularly so do keep checking. 🙂
This excellent website has lots of good info about upcycled baby clothes and easy projects to make. I’ve bookmarked it and look forward to your next article. 🙂
Thanks Diane. I doing a 3 part tutorial at the moment on how to patchwork quilt http://www.upcycledbabyclothes.com/how-to-patchwork-quilt-part-one.
Hope you enjoy it. 🙂
I love your upcycled baby clothes website. There’s lots of information and simple tutorials for beginning sewers, great job!
Thanks Paula. I did enjoy making the taggie blanket and there’s lots of scope to create your own design. 🙂
What a great website, I love the name Upcycled baby clothes and like the way you’ve written simple projects for beginners. Good job!
Thanks Ian. I like to make simple things myself and it’s a great way to use fabric scraps. 🙂
My sister has just had a baby and I’ve been stuggling for gift ideas, she has so much stuff already. A hand made taggie blanket is perfect, thanks for helping me out!
How cute, a new baby in the family. Taggie blankets are always popular, I know my Granddaughter lovers hers! Thanks for the comment. 🙂
What a good idea upcycled baby clothes is! I love your website and the taggie blanket looks so easy to do with the clear instructions and pictures. Good job. 🙂
Thanks Marie. Most of my projects are simple and I know myself I follow instructions better if I have pictures. Watch out for more projects coming up! 🙂
I was looking for something to make with fabric scraps and this taggie blanket is perfect.I suppose you can make it any size, even pram cover size might be nice.
Pram cover size is a good idea, warmth and play both at the same time! thanks for the comment. 🙂
This excellent website really has lots of information about upcycled baby clothes, a great way to reduce our carbon footprint. I’m bookmarking this one!
Thanks Susan. It’s becoming ever more important to think about the environment and why I start upcycled baby clothes. 🙂
Hello! Someone in my Myspace group shared this site with us so I
came to check it out. I’m definitely enjoying the information.
I’m bookmarking and will be tweeting this to my followers!
Exceptional blog and wonderful design.
Glad you enjoyed it and I appreciate you sharing! 🙂
I love your web site, some great upcycling projects. When I have time I will be back
to read more, keep up the good work!
Thanks for your positive comments, upcycling is something we should all think about doing! 🙂
Nice post and there’s a lot of useful info over the whole site. I’m bookmarking this one!
Thanks Blaine, lots of nice upcycling projects, even beginners can do them! 🙂
Hello! I’ve been following your website for some time now and just wanted say I love all the upcyled projects!
Thanks Tracey, amazing what you can do with a bit of curtain material! 🙂
I don’t even know how I ended up here, but I thought this post was good.
I do not know who you are but certainly you’re going to a famous blogger if you aren’t already 😉 Cheers!
Thank you. The Internets amazing for leading you to different places! 🙂
You are so cool! I don’t believe I’ve truly read anything like that before.
So wonderful to find somebody with a few unique thoughts on this topic.
Really.. thanks for starting this up. This site is one thing that is needed on the internet,
someone with a bit of originality!
Thank you for your positive comments. It’s amazing what cool things you can make by upcycling fabric, the taggie blanket is just one example. 🙂
Great information. Lucky me I ran across your site by accident (stumbleupon).
I’ve saved it for later!
Thanks for the comment, hope you found some useful tips. 🙂
What a lovely idea 🙂
Thanks Sarah, baby Lilly loves it and spent ages “talking” to the giraffe today! 🙂
Kathy, the way of you making the taggie blanket is really simple and great for those people want to do their own DIY blanket. I think the baby love to grab the tags that you made. 🙂
Thank you Nieve. Granddaughter Lilly is 9 weeks and already loves fiddling with the wee tags. 🙂
Such a simple but creative and beautiful idea.
thank you for sharing. a friend of mine had a new baby daughter at the weekend so I will get a few ideas.
Best Wishes,
Richard
Thank you Richard and congratulations to your friend. 🙂
I love these, but I don’t think I’m capable of making one. LOL I like the ones where you just tie the tags into place. This pattern is really nice, though. I have to admit you’re tempting me. 🙂
Well you’ll never know if you don’t try, I did say it was simple enough for a beginner! Thanks for the positive comment. 🙂
I always wanted a patchwork day blanket! This might be for baby blankets but I am sure it can be adjusted for all sorts of blankets. I am bookmarking this!
Thanks.
Janine
One day I’ll make a grown up version! It is really easy to do even if you don’t use a sewing machine. Thanks for the comment. 🙂