Blog Archives

Jack and Jill Market

FacebooktwitterredditpinterestFacebooktwitterredditpinterest

jack and jill marketNot a new concept, selling and upcycling second-hand goods but, with daughter and I having used the Jack and Jill Market to purchase most of the items baby Lilly has needed I decided to write about the experience. this is a great way to make some money as a seller or save money as a buyer.

What is the Jack and Jill Market?


The Jack and Jill Markets are based in Scotland and are regular indoor markets where you can buy and sell second-hand baby and children’s goods (up to 9 yrs). A community-based initiative, it started in 2010 when a group of Mums got together and came up with the idea. From large items like prams, cots and car seats to clothes, toys and maternity wear, you can find just about EVERYTHING you need and at a fraction of the cost! There are markets across Scotland and most weekends have a market going on somewhere.

Selling


How much of your baby stuff did you put up the attic, or in the shed? Booking a stall at the baby market is a great way of making some money and decluttering. To book a stall, it costs £25. This includes advertising, both online and off, all indoor venues, a 6ft table, a couple of chairs, a table cover, and 4 x spaces in the gallery for large items. No commission is taken, any money earned is all yours!

I’ve spoken to many of the stall holders about their experiences and they were all positive. Most said they made over £200 and 1 lady was delighted with her £600 profit. She had sold some larger items, a pram system, cot and high chair.

You need a very early start to get organised and should check all the details, terms and conditions. Rusting, badly worn items aren’t allowed but you get a free guide when you book with tips on how to set up and sell. Staff can be contacted by email or phone so there’s plenty of support.

Buying


Firstly, if you’re looking for a larger item like a pram you need to get there early, these items are hot and go first!

jack and jill market queueDoors open at 10.30, I usually go with daughter and baby Lilly and get there around 10. The queue is always massive, round the corner and down the street. You can either get there early and be first in or, go at 10.30 and be at the back of the queue, either way, you’ll have a 30/45mn wait. If you’re taking children with you be prepared, have snacks, and suitable clothing for the weather.

It costs £1.50 for entry and depending on the venue there’ll be a cafe or vending machine. If you can leave children with a babysitter then do. The Jack and Jill market is a noisy busy place. Navigating around the stalls and trying to look at goods pushing a buggy and/or watching young children is challenging, I’ve seen a few frayed tempers on my visits!

jack and jill market large gallery systemIf you’re looking for a large item head off to the Large Item gallery first, as I said, these items go quickly. A good system is in place for this. Each item has a ticket with the price, description and stall number:

  • go to the relevant stall holder
  • pay for the item
  • get the receipt
  • take it back to the staff manning the Large Gallery area
  • the sold ticket will go on the item


You can safely leave the large items in place till you’re ready to leave.

Now it’s time to move on and browse the stalls and I was stunned on my first visit, You can buy EVERYTHING baby related, even breast pumps and pads! We (daughter and I) decided to walk round the stalls first for a quick glance then get the shopping list out and look for specific items.

The prices varied and some items were clearly overpriced, £4 for a teeny pair of second-hand booties? I don’t think so! The sensible stall holders were willing to negotiate and usually had realistic prices from the start. They didn’t want to be taking a pile of stuff back home with them again!

The stall holders who had taken the time to organise their goods into age groups and had sensible prices were the busiest. Some had offers like buy 3 items for £2, or had put together complete matching outfits.

Tbaby in highchair
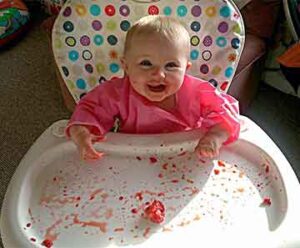
his Graco highchair was £10 and in pristine condition, not so pristine now though! The coverall apron was also a baby market item, £!


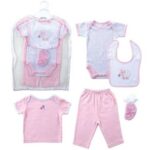
All the clothes Lilly wears have mostly been purchased at the Jack and Jill market. We’ve also bought disposable nappies, chicco baby carrietoys, steriliser, weaning cups, cutlery and the latest purchase was a back carrier.
Not the first size but for hiking over rough terrain with an older baby/toddler. Only £15, she’s a little bit small for it but loves it anyway!

As it gets nearer to closing time at 1pm some stall holders will drop their prices and you can pick up even better bargains. As I said earlier, they don’t want to be carting a load of stuff back home.


A word of warning, it’s easy to get carried away. Make a list of what you need and try to stick to it. On our first visit, we bought so many clothes and much of it has never been worn. Of course, we can always go as sellers and resell these things!

The Jack and Jill market really is one of the best ways I’ve seen of buying all those essential baby items for a fraction of the cost. Yes, it’s busy and you have to queue but it will save you £100s on retail prices. For more details and to find out about the Jack and Jill markets in your area pop over to their website. They even have an online market now too!

Have you been to a Jack and Jill market? Share your experiences in the comments section below, I’d love to hear from you!


FacebooktwitterredditpinterestFacebooktwitterredditpinterest

Alternatives to Recycling

FacebooktwitterredditpinterestFacebooktwitterredditpinterest

Sometimes for various reasons making your own things isn’t practical, it might be because you

  • don’t have the time
  • lack the skills
  • lack the time to learn the skills

There are alternatives to recycling and upcycling and we can always find ways to reduce our carbon footprint.

Eco Friendly Baby Clothes.

Eco friendly baby clothes are made without harsh chemicals and with non toxic dyes. There are many different organic natural fibres used such as:

  • Cotton
  • Hemp
  • Bamboo
  • Soy
  • Wool

Most eco friendly baby clothes are eco friendly baby clothesalso Fairtrade, meaning the producer receives a fair wage for their work. There are many stores now selling these products both on the high street and online. Hudson Baby Clothes are an ethical company and sell a cute range of organic baby clothes in bamboo and cotton, at affordable prices. A Google Search will find tons of results, lots to choose from!

Modern Cloth Nappies.

Decisions decisions, disposable or cloth nappies? For cost effectiveness modern cloth nappies are the way to go. Having said that, many parents opt for both, disposables for outings and cloth for at home. These days cloth nappies are sold as “systems.” No more learning how to fold them and chaffed legs from rubber pant elastic! Check out the Charlie Banana 2-in-1 Reusable Diapering System link to see what a modern cloth nappy looks like.

For disposables Naty Babycare Diapers are the most well known. Bleach free and in a wide range of sizes these will help keep your baby free of the dreaded nappy rash! Their products are 100% renewable so a very eco friendly disposable nappy to buy.

Eco Friendly Baby Toys.

I’ve written a couple of tutorials for making your own baby toys from scrap fabric like this taggie blanket and plush baby toy. Again not everyone has time to do this but there are many companies now producing eco friendly baby toys. Ethical Superstore based in the UK stock a wide range of toys amongst a wide range of ethical goods. In the US Amazon is a good source of eco friendly baby toys.

And Lastly

Another often forgotten about alternative to recyling is to buy your baby items from charity shops. Many of these items are like new, as you know babys don’t stay the same size for long. Second hand baby markets are also a good source of items for your baby. I’ve used these myself and seen everything being sold, from pram systems right down to booties, toiletries and toys.

Happy Shopping!


FacebooktwitterredditpinterestFacebooktwitterredditpinterest

Baby Christmas Dress

FacebooktwitterredditpinterestFacebooktwitterredditpinterest

I was thinking about making a baby Christmas dress for Granddaughter Lilly and wondering about fabric when this appeared at my door. 

Christmas Curtains
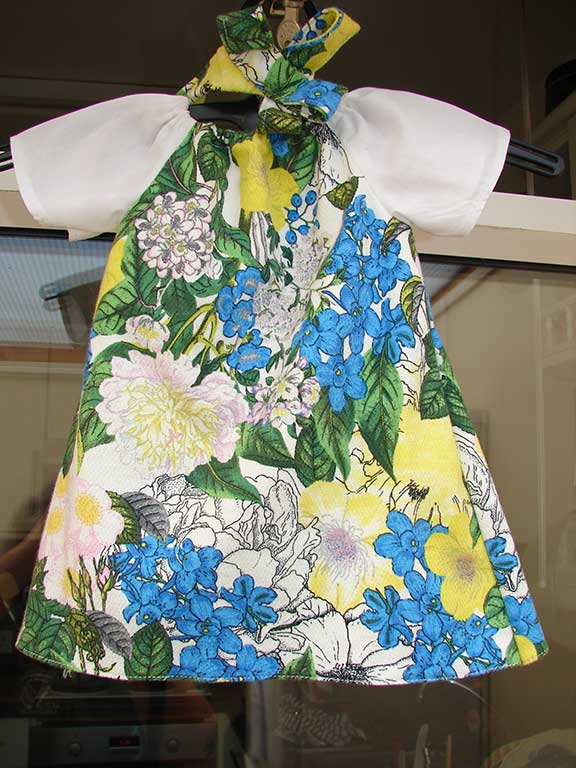
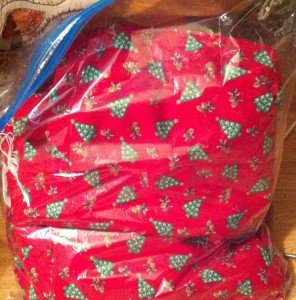
A bag full of curtains!

There were four pairs of curtains in the bag, all lined with red fabric. I didn’t take measurements but there was a LOT of fabric in there!


Unpicking

First was the job of unpicking, Unpicking the fabric
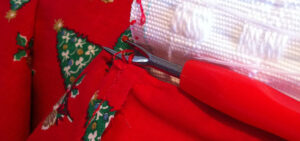
I like to reuse as much as possible so the curtain tape came off first. That will get saved in my haberdashery box for future use.


Then I separated the lining. Christmas Fabric
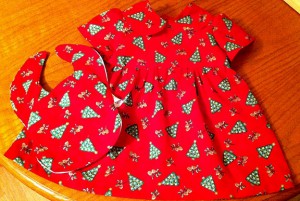
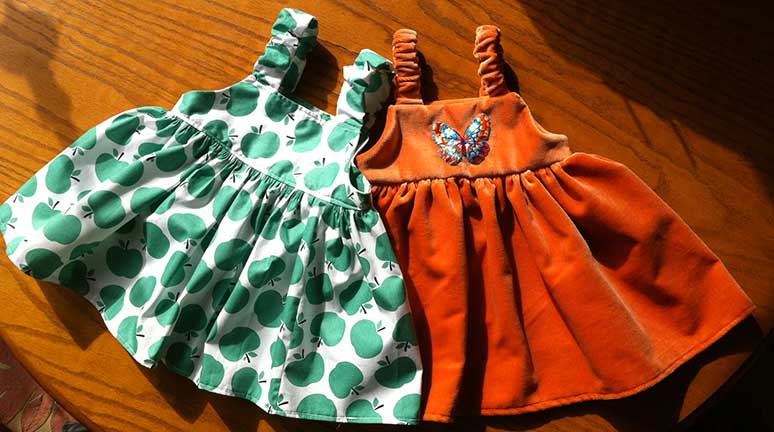
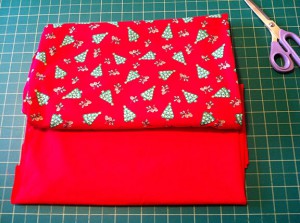
I’ll only be using the printed fabric for this baby Christmas dress and will hardly use even 1 of the curtains. Enough to make a dress each year as baby Lilly grows!
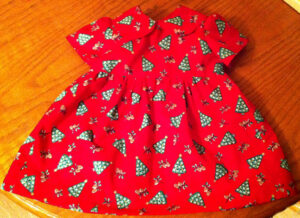
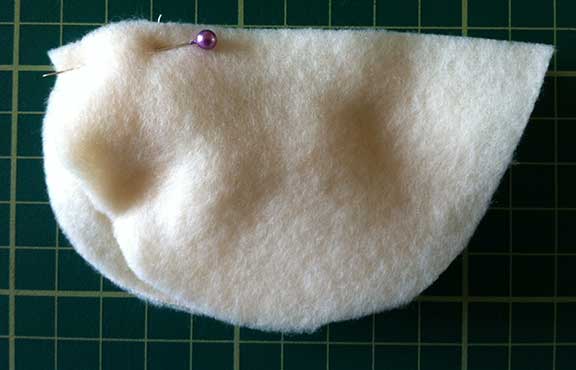
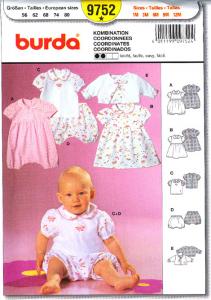


Making the Dress

Then it was time to start making Baby dress patternthe dress. I used a BurdaStyle pattern, 9752 which gives a few different options on style.

Following the instructions I pinned the pattern onto the fabric. There’s a tutorial here for how to read sewing patterns.


I usually find Burda patterns easy Sewing the Collar
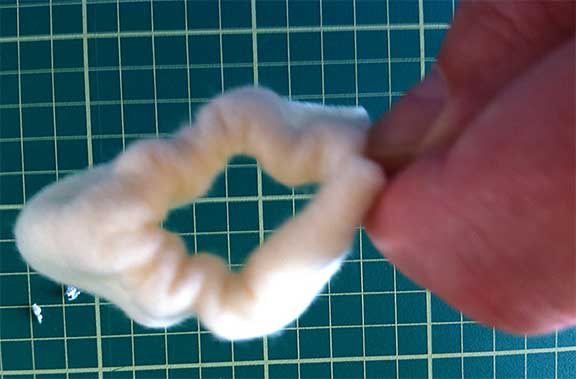
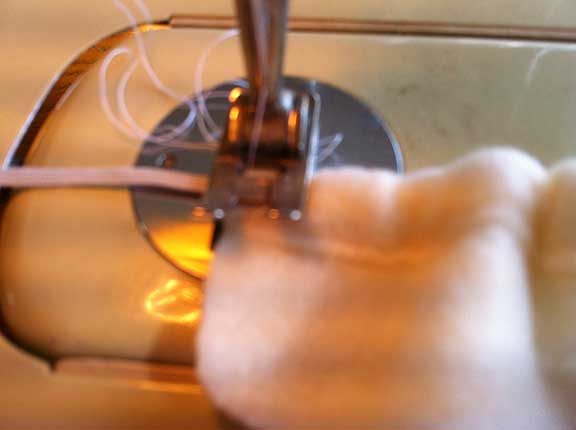
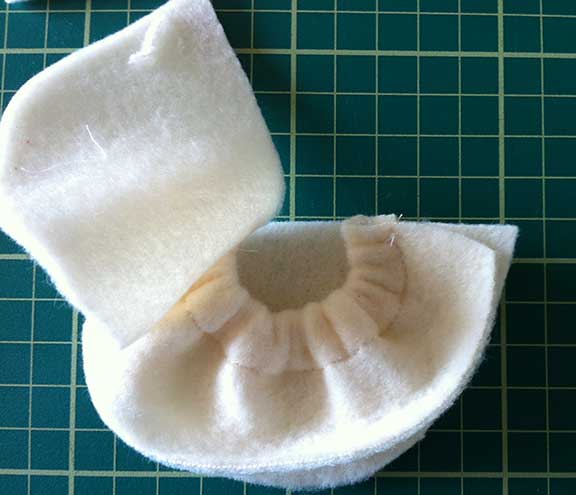
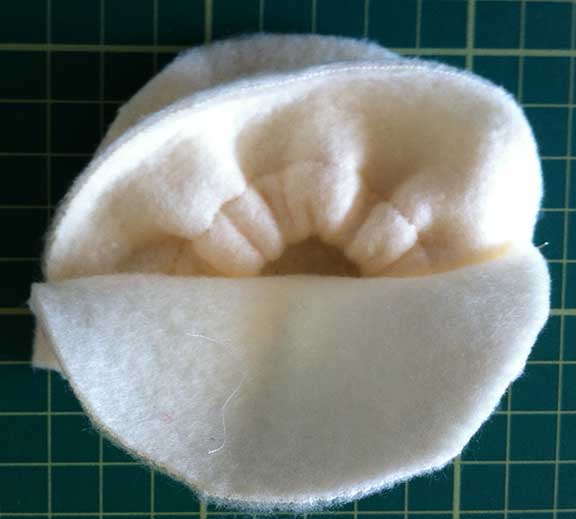
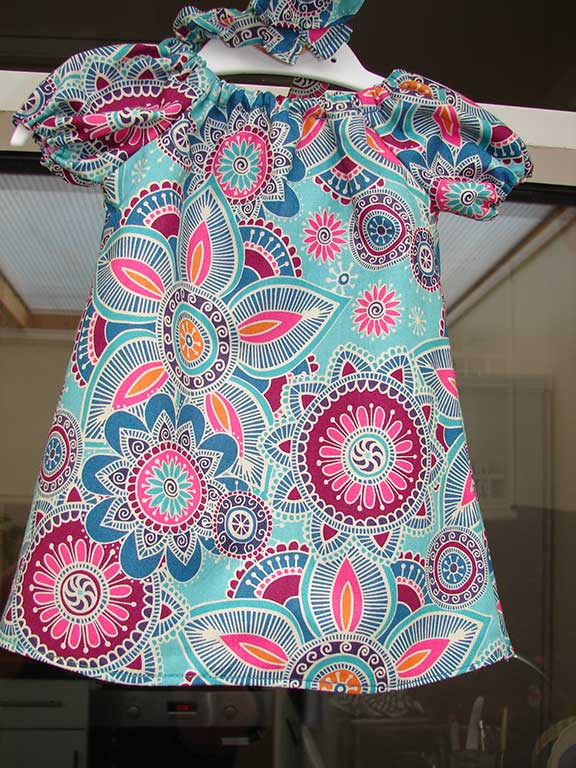
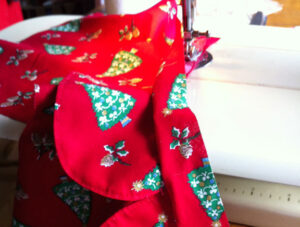
to follow but the collar on this on really had me stumped. I spent a long time trying to figure it out but after a bit of trial and error and the help of a sewing forum I got there.

I used to have a problem inserting sleeves but have finally mastered that skill!


This is the top half of the Top Half of dress
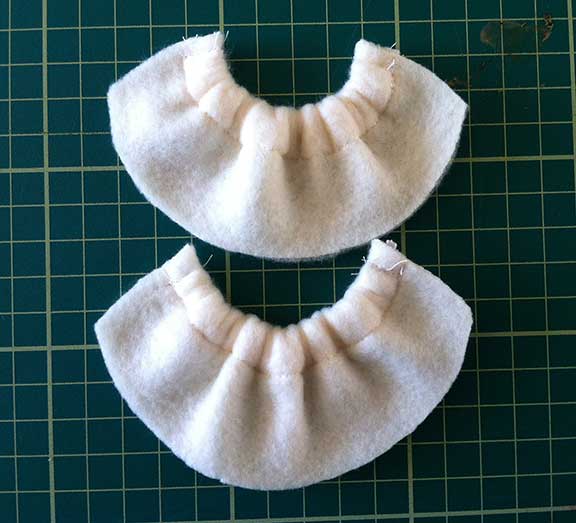
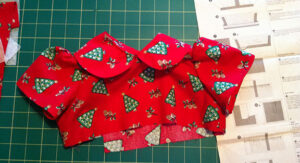
dress finished ready for attaching the skirt.


The skirt was straight forward with a simple gather around the waist. I’ve used this technique on many baby dresses and will be posting a “how to” tutorial soon. It gives a nice fullness to the skirt and makes sure there’s plenty of room around baby’s hips.

Baby Christmas Dress Finished!

Because of the problems I had with the collar this took me around 8 hrs to make. I did manage to run up a matching bib in that time though. Now Lilly will have this cute baby Christmas outfit to wear over her first festive season!

baby christmas dress

Baby Christmas dress Baby Christmas dress

FacebooktwitterredditpinterestFacebooktwitterredditpinterest

Free Baby Dress Sewing Pattern

FacebooktwitterredditpinterestFacebooktwitterredditpinterest

I was searching for a free free baby dress sewing pattern
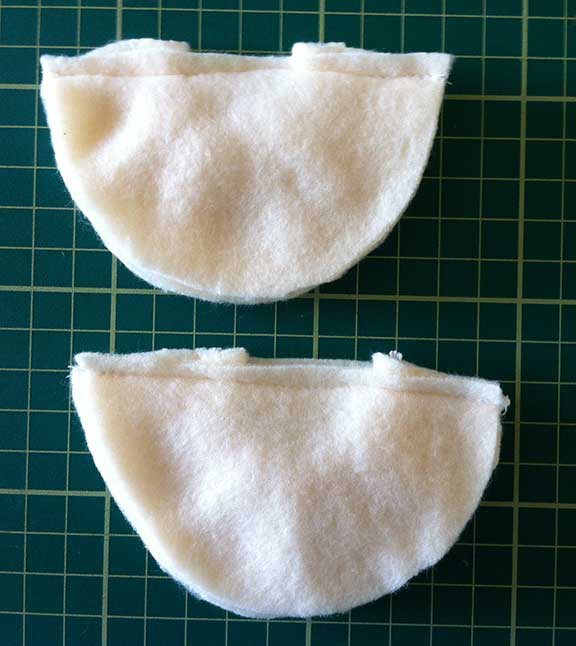
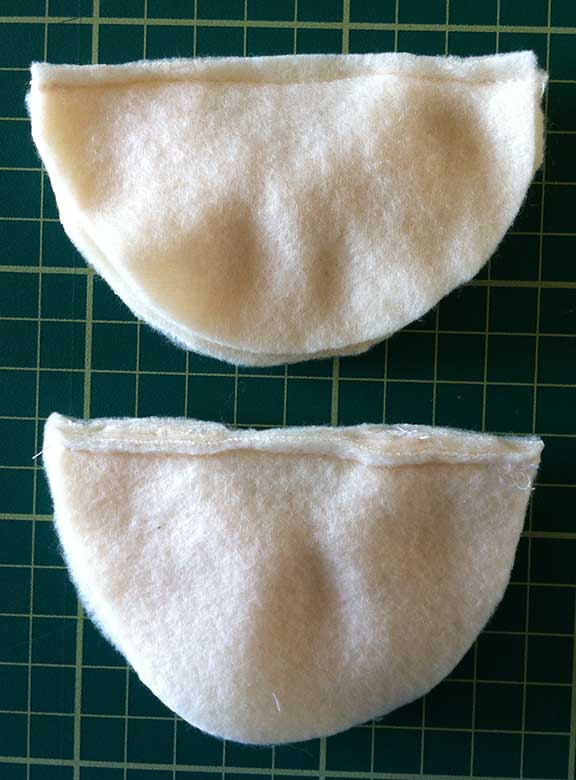
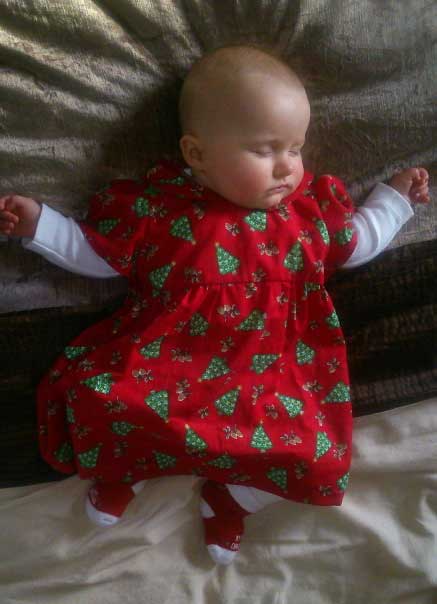
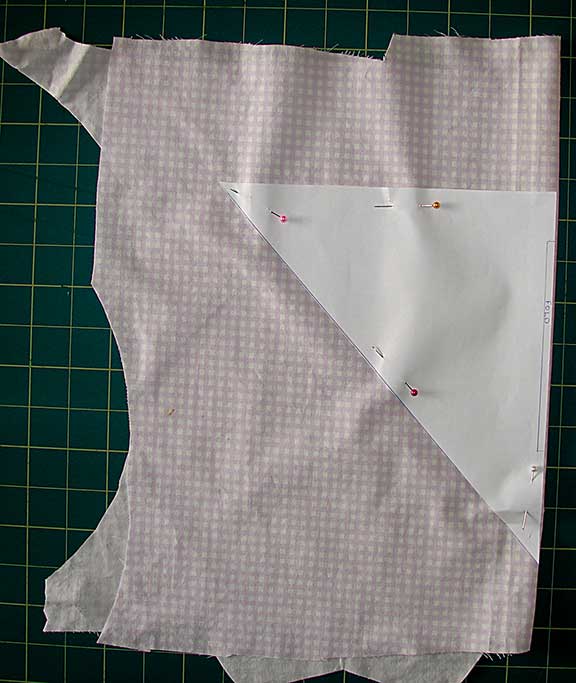
baby dress sewing pattern (I’m using this resource while I  learn how to make my own) and found this
one at See Kate Sew, so simple and I love the elasticated shoulder straps very effective!

I decided to make 2 of these at the same time, they looked so simple. I had some cute apple print cotton which was purchased in a sale and some cotton velvet, (I have a massive bolt of this from a close down sale).


I downloaded the pattern then cut all the Pattern pieces cut outpieces following the instructions on Kate’s blog. The velvet frayed terribly and I thought about not bothering with it, bits everywhere!


This where my Brother Overlocker came in handy and I went round all the pieces with it. If you don’t have an overlocker you can use pinking shears or the zig zag stitch on your sewing machine or, just stick to a cotton fabric.


It’s worth taking a bit of time Overlocked Velvetto do this, it gives your seams a much nicer finish.


From there the instructions were straight forward with clear images to guide you through the tutorial. Three hours later I had 2 cute dresses! The seams on the velvet dress were a bit bulky so if I was using it again I’d just have 1 layer of velvet for the outer bodice and use a thin lining for the inner bodice. I had the butterfly motif in my box so hand stitched it on for a bit of decoration.The velvet dress could be worn over a top with a cardigan making it suitable for colder weather, versatile wee dresses and all from a free baby dress sewing pattern!

2 baby dresses from free sewing pattern

FacebooktwitterredditpinterestFacebooktwitterredditpinterest

How to make Plush Baby Booties

FacebooktwitterredditpinterestFacebooktwitterredditpinterest

As promised I’m going Plush baby booties
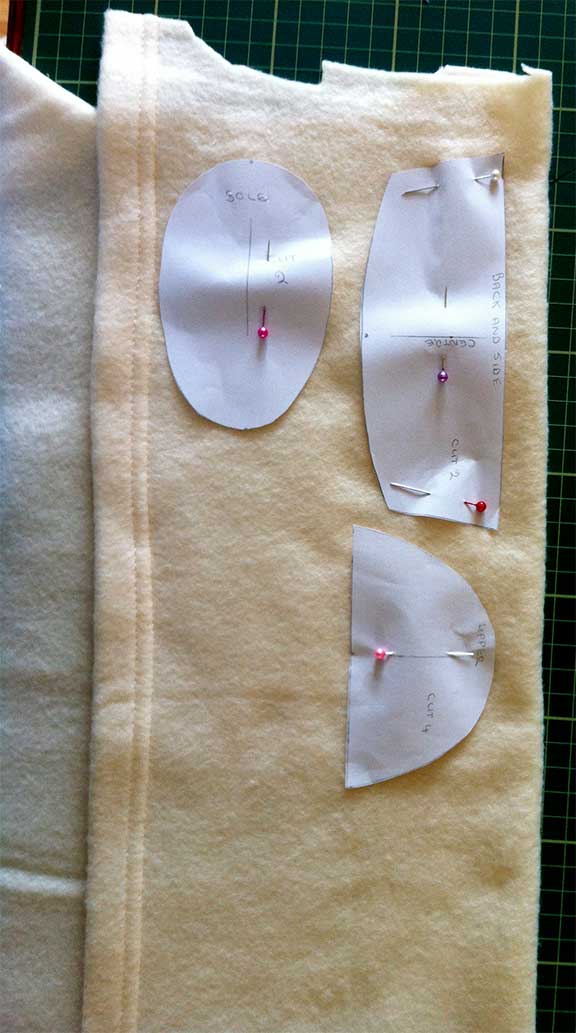
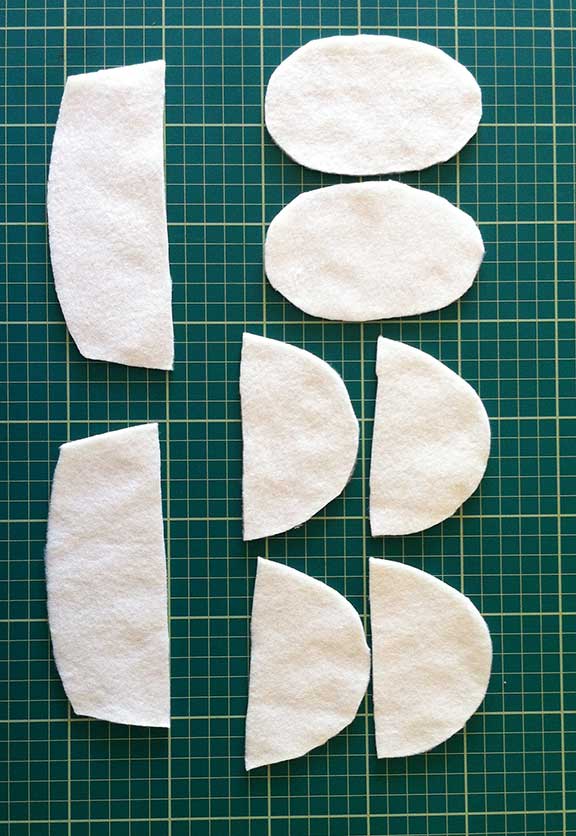
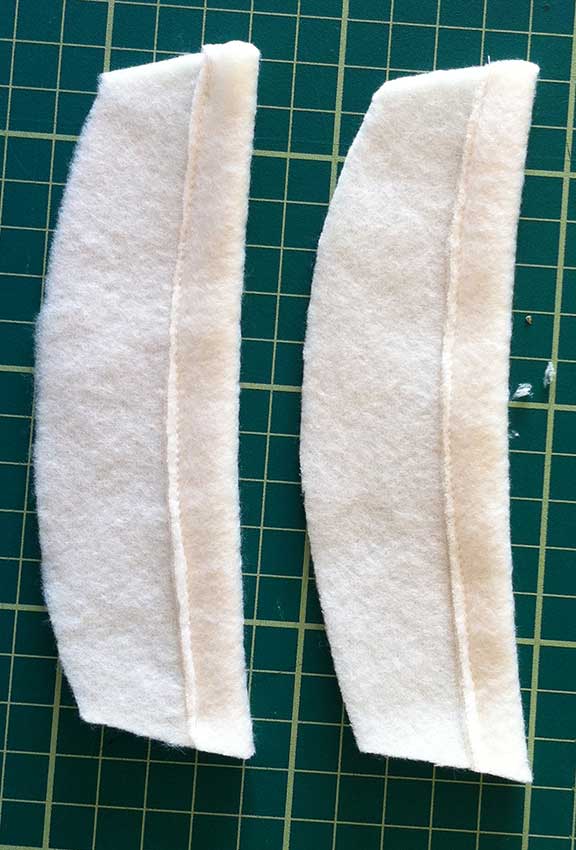
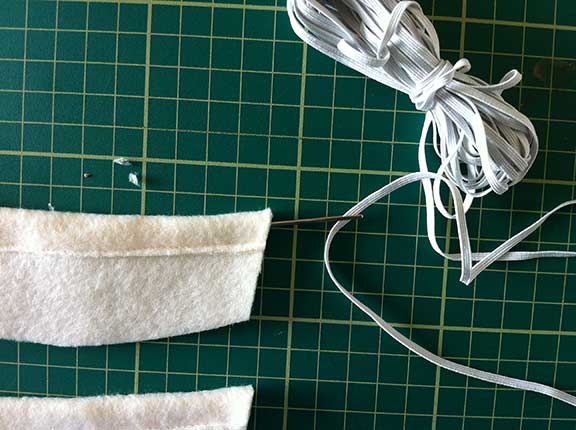
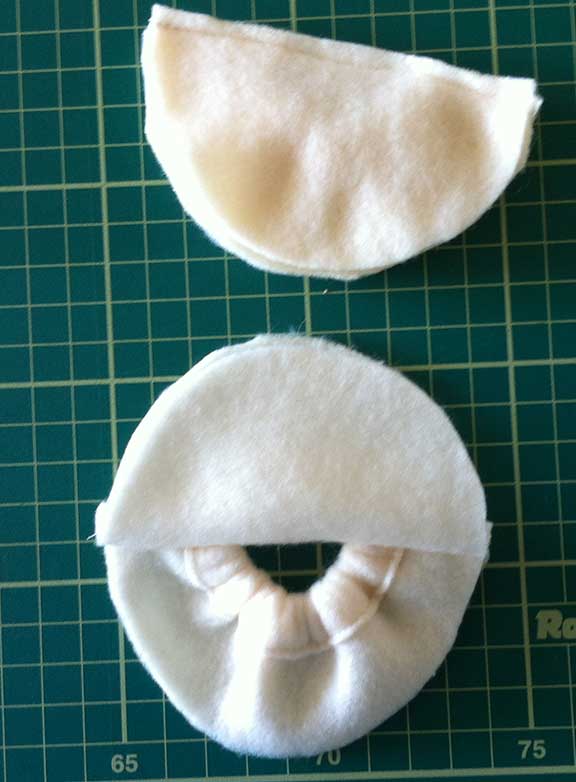
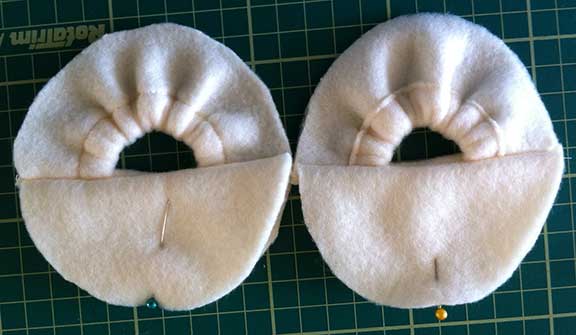
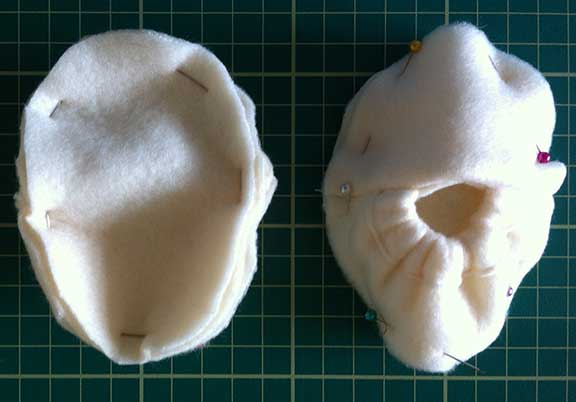
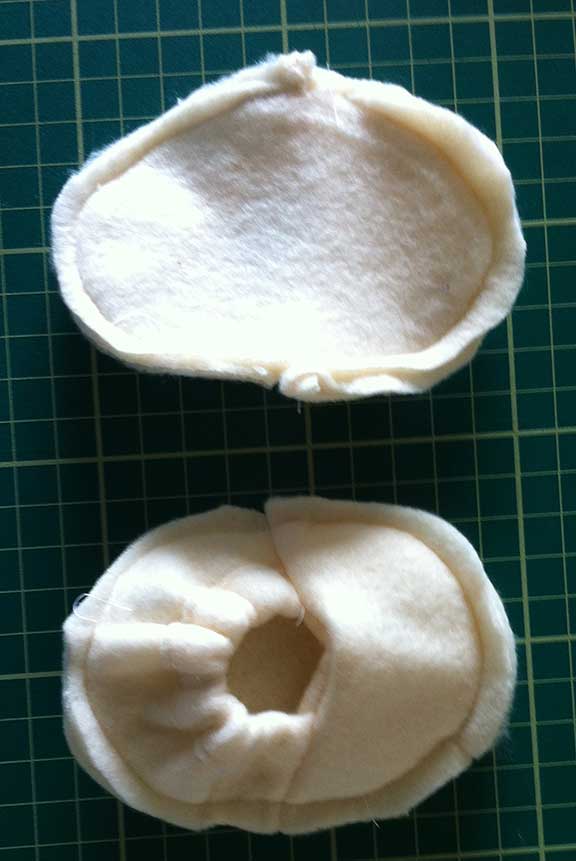
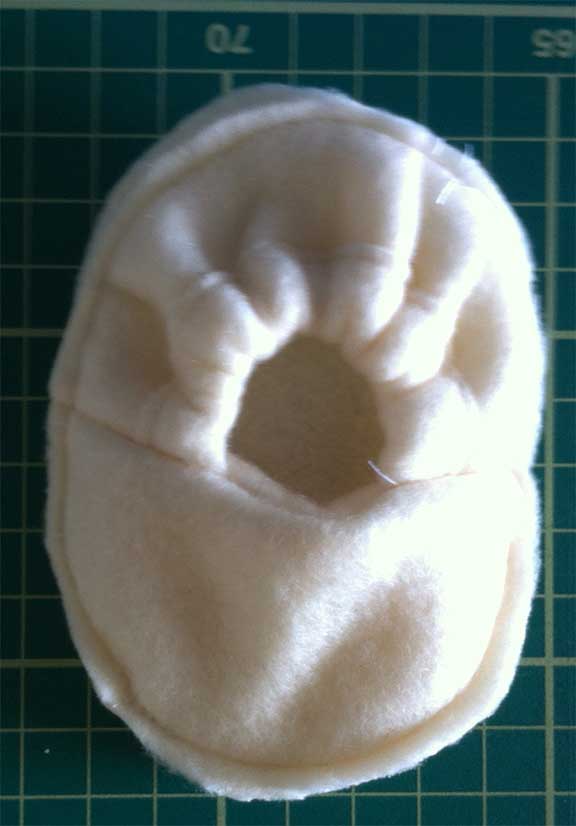
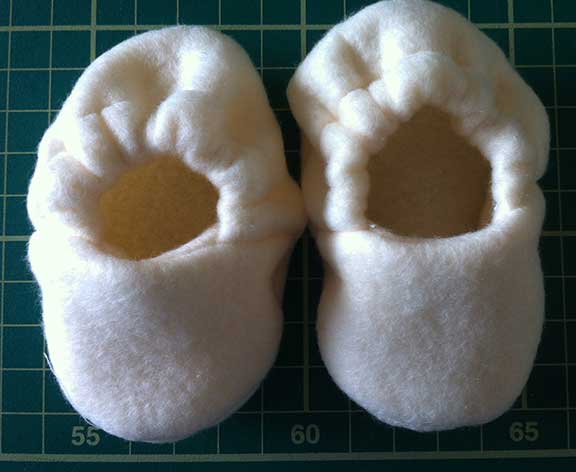
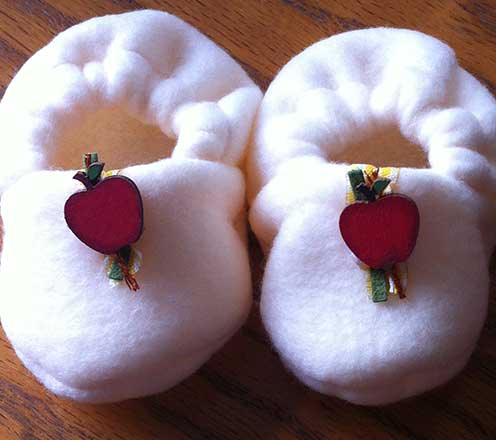
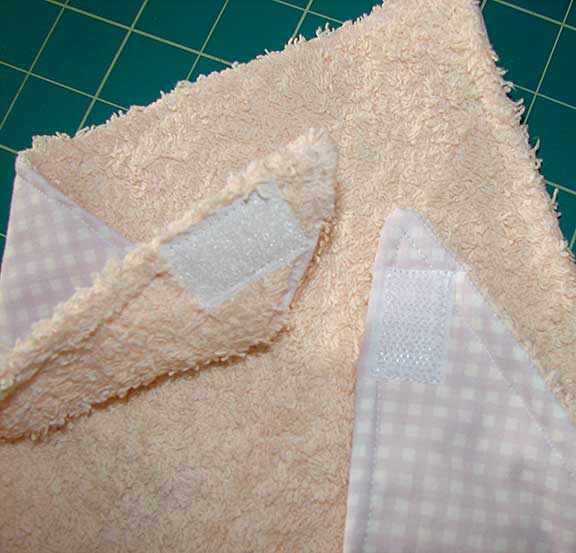
to show you how to make plush baby booties like these, and the ones in an earlier blog post Here’s one I made earlier.” I used fleece but you can use any fabric or trim. These are small enough that it wouldn’t take long to sew them by hand if you don’t have a machine.


First download the pattern here  Upcycled-Baby-Booties

The pattern is for 3mths but I’ll explain how to make them smaller later in the tutorial.


Next gather your materials: Materials

  • Fabric (fleece and cotton work well)
  • Elastic (1/4″)
  • Pattern


Cut out the pattern pieces from the paper. Paper pattern pieces


Fold the fleece (it doesn’t matter which way) Paper pattern pinned to fabricand pin the pattern pieces to it.


Then cut out the pieces remembering to cut 4 for Pattern pieces cut outthe upper.


Take the 2 “back and side” pieces and stitch a hem alongHem stitched for elastic the straight edge wide enough for the elastic.


Thread the elastic through the hem using a Elastic being threaded through hemdarning needle with a large eye.


Hold onto both elastic ends and pull to Pulling elastic ends together to form top openinggather.


To secure the elastic in place stitch backSewing elastic in place and forward over it.


Tidy up the ends and you’ll be left withFirst 2 pieces complete 2 pieces like this.


Now, this is the bit that’s tricky to explain Sandwich upper pieces with elasticated bitshence the extra pics! Take 2 of the uppers and sandwich the elasticated pieces between along the straight edge.


12


14


Stitch along the straight edge.Stitch along stright line


Tidy the seams.Tidy up seams


Flip the back/side over and mark the centre.Mark the centre


mark the centre 2


Line up the centre of the soles to the centrePin soles to uppers of the uppers, pin and stitch.

This is where you can make them smaller by sewing the seam further in.


Stitch and trim seams


Tidy up the seams.Tidy seams


Turn right side out.Right side out


All that’s left is to add the trim, you can use anything here, just make sure it’s well secured on the bootie!

One pair of finished plush baby booties!

Finished plush baby booties with trimPlease contact me if there’s anything about this tutorial you need help with.

FacebooktwitterredditpinterestFacebooktwitterredditpinterest

Upcycled Bandana Bib

FacebooktwitterredditpinterestFacebooktwitterredditpinterest

Bandana Bibs are simple to make and great for making use of fabric scraps and towels. You can use left over fabric from a baby outfit to make a matching upcycled bandana bib. They’re also great for gifts, make a set of 3 with pretty fabric, a baby can never have enough bibs (you might recognise the fabric in this article!). Firstly make your pattern or you can use the one below. I used an existing bib, folded it in half,  laid it on an A4 sheet of paper, then drew and cut round it. You can do this for any style of bib. I’ll generally do a few at the same time as they don’t take long.

Download PDF File here bandana-bib

TIPCheck charity shops and car boot sales for towels or keep your ears open for friends who are changing their bathroom colour scheme and buying new towels!

Next gather your materials:

  • Pattern
  • Fabric of your choice, cotton works well for this.
  • Toweling or microfibre fleece.
  • Fastener, I use hook and loop/velcro but you can use press studs if you prefer

Materials

Fold your fabic in half and pin the pattern on, putting fold mark on pattern against fold in fabric.

paper pattern pinned on

Cut out and repeat for towelling, you’ll then have 2 pieces like this:

Cut out fabric

If you don’t have an overlocker, at this stage do a zig zag stitch round the towelling edge to stop fraying (not needed if you use micro fleece). Pin the pieces right sides together and overlock/sew together leaving a 4″ gap (for turning right side out).

Pin fabric pieces

Sew and overlock fabric pieces

Turn right side out and press turning the gap edges in.

Turned right side out and pressed

Top stitch all the way round making sure you catch the folded in edge.

The last thing is to sew on your fastening, I prefer hook and loop as it’s easy to whip on and off a fidgety baby!

Sew on hook and loop for fastening

And that’s it, simple! Here it is beside 2 others I made previously in a different size and style.

3 upcycled baby bibs different styels


FacebooktwitterredditpinterestFacebooktwitterredditpinterest

Here’s one I made earlier.

FacebooktwitterredditpinterestFacebooktwitterredditpinterest

As I mentioned on the “About” page, I ‘ve a grandaughter due (6 days and counting UPDATE –  SHE’S ARRIVED!) and I’ve been making baby clothes for a few months now, hence the title “Here’s one I made earlier!” I found a simple pattern for a baby dress to start me off, free here

A clear and concise tutorial and such cute pictures of her twins. I made a couple of dresses with this pattern and plan to do more but upscale in size.

This one was made from a summer skirt that had a light lining. Made-earlier1There wasn’t quite enough fabric for sleeves so I used the lining for them. There was just enough left to do a wee hairband, can’t wait to see it on new baby!

TIP: Keep all your leftover scraps from projects, great for trims/bows and making hairbands .


The fabric in this one I love! This wasn’t stictly upcycled as I Made-earlier2purchased the fabric from Hobbycraft for a festival belt project. There was enough left for the dress and matching headband, size 0-3mths, it’s tiny!


I’m going to be doing a tutorial (UPDATE, TUTORIAL HERE) on these baby booties, so quick and simple to do. I purchased a fleece baby blanket (out of bargain bin) for £2.50, plenty ofBooties-2 material for lots of booties and another opportunity to upcycle scraps for the decorative bit on the toes. I found it a bit tricky to get the toes evenly rounded on the first pair but was getting better by the second ones, I’ll show you how on the tutorial coming soon.


UPDATE…..

I wrote this post a while back, have completed more projects since then and baby Lilly is growing fast Here she is wearing the baby Christmas dress I made out of some Christmas curtain fabric!

here's one I made earlier


FacebooktwitterredditpinterestFacebooktwitterredditpinterest

Upcycled Baby Outfit

FacebooktwitterredditpinterestFacebooktwitterredditpinterest

A few weeks ago I picked up some upcycled baby outfit
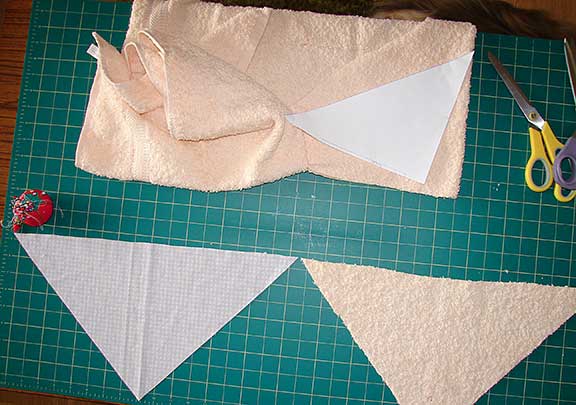
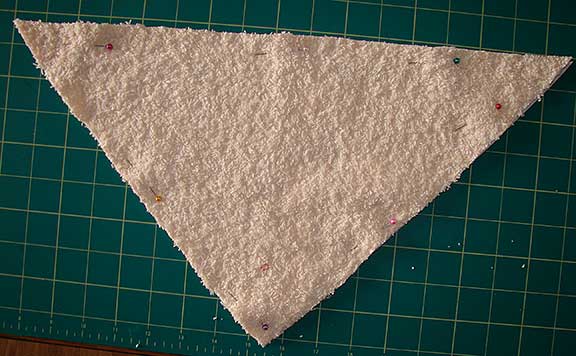
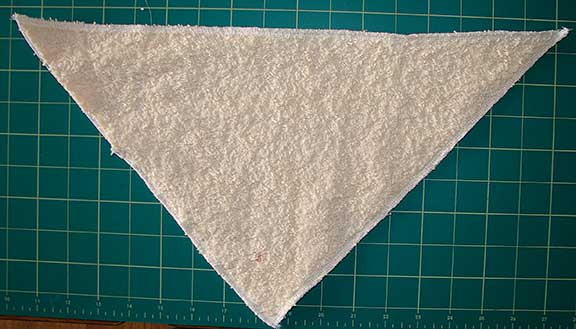
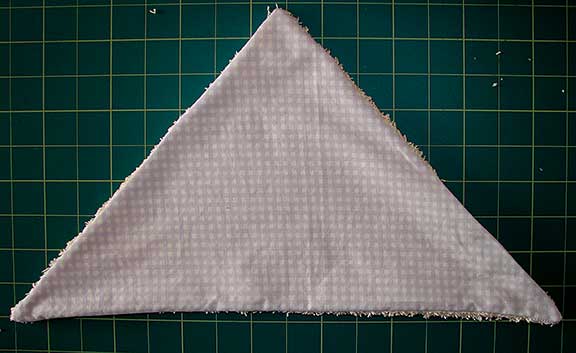
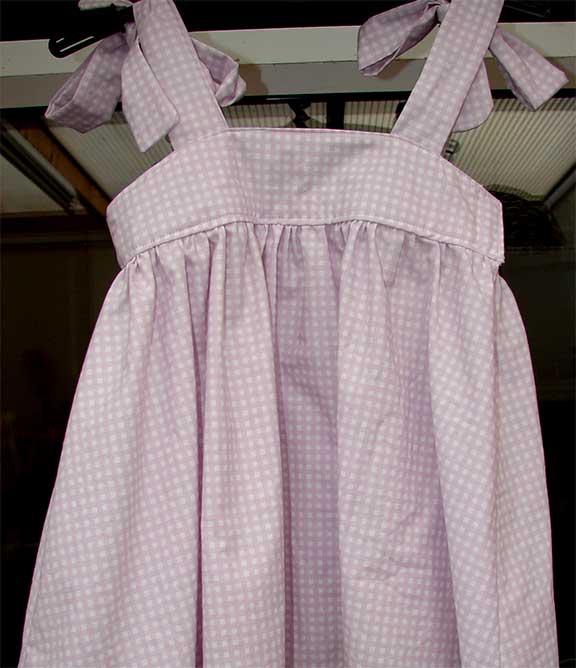
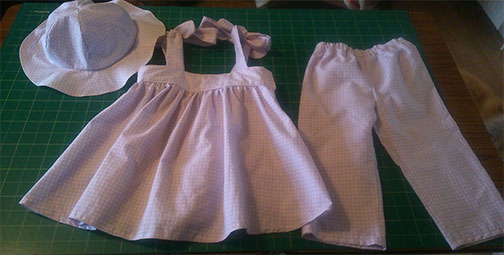
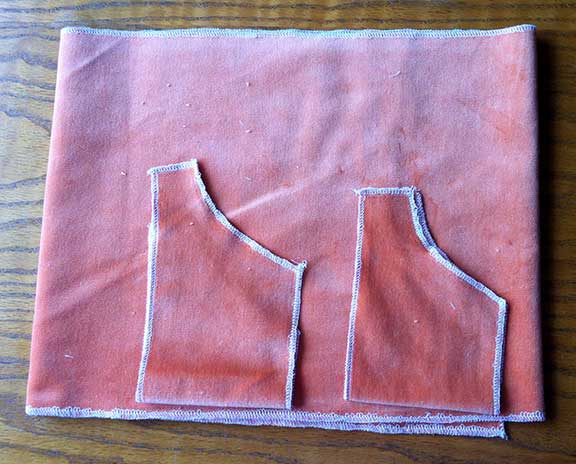
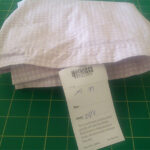
bedding at a charity shop, bargain at £1.99, loads of fabric in there with very little unpicking to do. I’ll be able to get more than 1 outfit out of the fabric depending on what I make. I thought I could make an upcycled baby outfit for the summer with this bedding.

Tip: Keep your eyes open for bargain rails in charity shops. They often have garments you would never wear but nice re-usable fabric


Which Pattern

I used Burda kids pattern 9437 for the trousers and suntop and McCalls M6575 for the hat, not beginners patterns but easy to do. My new overlocker sewing machine (review here) makes things much simpler and neater! The Burda patterns were on half price sale so another bargain there! The Mcalls pattern had so many different options for both boys and girls. The Burda pattern could be adapted quite easily as it’s a simple shape.

51o96uFzX7L._SY300_ 9437_KSBBUR9437

The BurdaStyle Website is a great resource for sewers from beginners to advanced and they have a special offer on seminars at the moment, 30% off with the code NSM30, BARGAIN!     

Making the Outfit                                                BurdaStyle.com

The whole outfit took about 8hrs total over a few days, once I get used to my new Brother overlocker sewing machine (did I mention I have a new overlocker!?) this will speed up. The pattern was fairly easy to follow but if you’re just starting to use patterns check out my guide on how to read patterns.

I did the 18mths size but I’ve noticed the Burda patterns make up quite large so I reckon it’s more likely to fit a 2 yr old. The hat was quite fiddly to make, sewing the hat rim to the crown was trickier than I thought. I did managed to achieve it without gettting any puckers though. There was nothing in the instructions about the best way to do this so I Googled for tips. I think I’ll baste and sew next time, rather than go straight from pinning to sewing.

I like the way the dress ties at the top, makes it a great dress for on the beach. I don’t have a toddler to model the outfit yet so the photos don’t do it justice, it really is quite pretty!

So there it is, how to make an upcycled baby outfit using charity shop bedding, best of all it only cost pennies to make!

Dress PurpleCheck


FacebooktwitterredditpinterestFacebooktwitterredditpinterest